Install the Casdoor server
This guide explains how to install the Casdoor server on your own machine, connect it to a database, and sign in for the first time.
Learning outcomes
- Get Casdoor from a pre-built binary or build it from source.
- Connect Casdoor to a database.
- Run Casdoor in development mode and in production mode.
- Sign in to the Casdoor admin console.
What you need
- A machine that runs Windows, Linux, or macOS
- A supported database that Casdoor can reach
- To build from source: Go 1.21+, Node.js LTS (20), and Yarn 1.x
Don't want to run it yourself? Casdoor Cloud gives you a dedicated Casdoor instance that we host and keep upgraded for you, from $25/month with no per-user fees.
About the Casdoor server
Casdoor is one repository, casdoor/casdoor, with two parts:
| Part | Beschreibung | Stack |
|---|---|---|
| Frontend | Admin console and sign-in pages | TypeScript, React, Vite |
| Backend | REST API and protocol endpoints | Go, Beego, XORM |
In production, the backend serves the built frontend, so you run a single process on a single port.
Supported databases
Casdoor uses XORM to talk to the database and supports the databases that have an XORM driver:
- MySQL
- MariaDB
- PostgreSQL
- CockroachDB
- SQL Server
- Oracle
- SQLite 3
- TiDB
Get Casdoor
Choose one of the two options.
Download a pre-built binary
-
Download the archive for your platform from GitHub Releases. Binaries are available for Linux, macOS, and Windows, each for x86_64 and arm64.
-
Extract the archive. It contains the
casdoorbinary, the built frontend, and a sampleconf/app.conf.# Linux and macOS
tar -xzf casdoor_Linux_x86_64.tar.gz
cd casdoor_Linux_x86_64 -
Run the binary:
./casdoor -
Sign in to the admin console at
http://localhost:8000.
Build from source
-
Clone the repository. Casdoor uses Go modules, so you can clone it anywhere.
cd path/to/folder
git clone https://github.com/casdoor/casdoor -
Run Casdoor in development mode or production mode.
Use Yarn 1.x to build the frontend. npm can cause styling issues in the UI. See casdoor#294.
If Go fails to download dependencies, set the GOPROXY environment variable, for example to https://goproxy.cn/.
Configure the database
Casdoor reads its settings from conf/app.conf. The default settings use MySQL. For a minimal setup, set driverName, dataSourceName, and dbName. For every other option, see Configuration.
MySQL
-
Create a database named
casdoor. -
Set the connection in
conf/app.conf:driverName = mysql
dataSourceName = root:123456@tcp(localhost:3306)/
dbName = casdoor
PostgreSQL
-
Create a database, for example
casdoor. XORM needs the database to exist before Casdoor starts. -
Set the connection in
conf/app.conf:driverName = postgres
dataSourceName = user=postgres password=postgres host=localhost port=5432 sslmode=disable dbname=casdoor
dbName = casdoor
For PostgreSQL, the database name appears twice: in dbName and as dbname inside dataSourceName. Both must be set. See casdoor#2127.
CockroachDB
CockroachDB uses the PostgreSQL driver and the same settings as PostgreSQL, with one extra parameter:
driverName = postgres
dataSourceName = user=postgres password=postgres host=localhost port=5432 sslmode=disable dbname=casdoor serial_normalization=virtual_sequence
dbName = casdoor
Add serial_normalization=virtual_sequence to dataSourceName before you create the database. Without it, Casdoor reports an error about an existing database every time it starts.
SQLite 3
Set the connection in conf/app.conf:
driverName = sqlite
dataSourceName = file:casdoor.db?cache=shared
dbName = casdoor
Run Casdoor from source
Run in development mode
In development mode, the backend and the frontend run as two processes. The frontend reloads when you change its code.
-
In the repository root, start the backend. It listens on port 8000.
go run main.go -
In a second terminal, start the frontend. It is a Vite project and listens on port 7001.
cd web
yarn install
yarn start -
Sign in to the admin console at
http://localhost:7001.
Run in production mode
In production mode, you build the frontend into static files and the backend serves them on port 8000.
-
Build the frontend:
cd web
yarn install
yarn build -
In the repository root, build and run the backend.
On Linux and macOS:
go build
./casdoor
On Windows:
go build
casdoor.exe -
Sign in to the admin console at
http://localhost:8000.
To listen on a different port, set httpport in conf/app.conf and restart the backend.
To load the configuration from another location, pass the --config flag. The flag takes an absolute or a relative path and replaces the default conf/app.conf lookup.
./casdoor --config /etc/casdoor/app.conf
Sign in to the admin console
- Open the Casdoor URL in a browser:
http://localhost:7001in development mode, orhttp://localhost:8000in production mode and for the pre-built binary. - Sign in with the organization
built-in, the usernameadmin, and the password123.
Change the password of built-in/admin before you expose Casdoor to a network.
Choose the URL that your applications use
Applications that sign users in with Casdoor need the URL of the Casdoor sign-in page:
| Mode | Casdoor URL for your applications |
|---|---|
| Development | http://localhost:7001 |
| Production | https://<your-casdoor-domain>, or the URL of your reverse proxy |
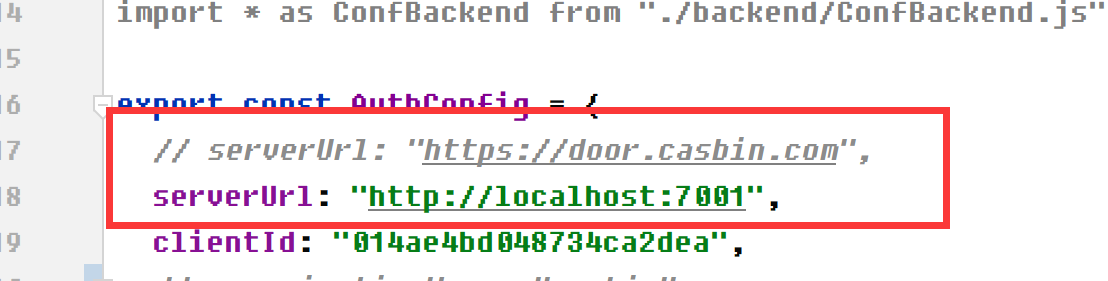
For example, Casnode signs users in with Casdoor. Its serverUrl is http://localhost:7001 in development and https://door.casdoor.com in production.
Next steps
- Configuration: Review every backend and frontend option.
- Connect an application to Casdoor: Sign users in to your own application.
- Deploy behind Nginx: Put Casdoor behind a reverse proxy with HTTPS.