Spring Security OAuth
Casdoor は OIDC プロトコルを IDP として使用し、さまざまなアプリケーションに接続できます。このガイドでは、OIDC を使用してアプリケーションに接続する方法を示すために Spring Security を例として使用します。
ステップ1: Casdoorのデプロイ
Casdoor をデプロイします。サーバーのインストールを参照してください。サーバーが実行中であり、ログインページを開いて、設定したパスワードで built-in/admin としてサインインできることを確認してください。管理コンソールへのサインインを参照してください。
Step 2. Configure Casdoor application
- 新しいCasdoorアプリケーションを作成するか、既存のものを使用します。
- リダイレクト URL を追加します(リダイレクト URL の取得方法の詳細については、次のセクションを参照してください)。
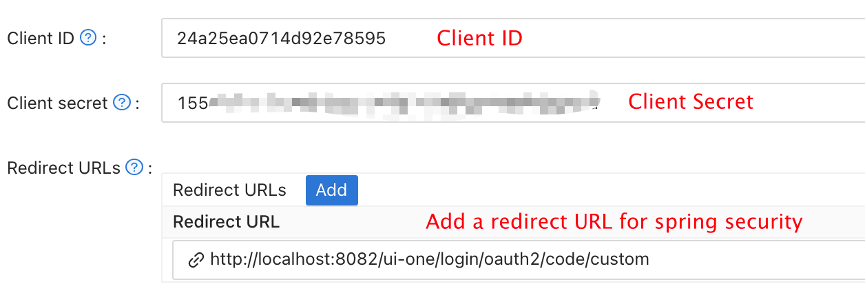
- 希望のプロバイダーを追加し、追加の設定項目を入力します。
次のステップのために、アプリケーションページから Client ID と Client secret をメモしてください。OIDC ディスカバリ: http://<CASDOOR_HOSTNAME>/.well-known/openid-configuration。
Step 3. Configure Spring Security
Spring Security は OIDC をネイティブにサポートしています。
Spring Security OAuth2 Client の設定をカスタマイズできます:
プレースホルダーを自分の Casdoor インスタンスの情報 (Client ID, Client secret など) に置き換えます。
- application.yml
- application.properties
spring:
  security:
    oauth2:
      client:
        registration:
          casdoor:
            client-id: <Client ID>
            client-secret: <Client Secret>
            scope: openid,profile,email
            authorization-grant-type: authorization_code
            redirect-uri: <Redirect URL>
        provider:
          casdoor:
            issuer-uri: http://CASDOOR_HOSTNAME
            user-name-attribute: preferred_username
spring.security.oauth2.client.registration.casdoor.client-id=<Client ID>
spring.security.oauth2.client.registration.casdoor.client-secret=<Client Secret>
spring.security.oauth2.client.registration.casdoor.scope=openid,profile,email
spring.security.oauth2.client.registration.casdoor.authorization-grant-type=authorization_code
spring.security.oauth2.client.registration.casdoor.redirect-uri=<Redirect URL>

spring.security.oauth2.client.provider.casdoor.issuer-uri=http://CASDOOR_HOSTNAME
spring.security.oauth2.client.provider.casdoor.user-name-attribute=preferred_username
issuer-uri を使用すると、Spring Boot は起動時に Casdoor のディスカバリードキュメントを読み取り、認可、トークン、ユーザー情報 (/api/userinfo) および JWKS エンドポイントを補完します。この値は、そのドキュメント内の issuer と一致する必要があります。Casdoor のユーザー情報では、preferred_username がユーザー名であり、name が表示名です。
For the default situation of Spring Security, the <Redirect URL> should be like http://<Your Spring Boot Application Endpoint>/<Servlet Prefix if it is configured>/login/oauth2/code/casdoor, where casdoor is the registration ID.
For example, in the following demo, the redirect URL should be http://localhost:8080/login/oauth2/code/casdoor.
これは casdoor アプリケーションでも設定する必要があります。
You can also customize the settings using ClientRegistration in your code. You can find the mapping here.
Step 4: Get Started with a Demo
-
Spring Boot アプリケーションを作成できます。
-
We can add a configuration that protects all endpoints except
/and/login**for users to log in. Spring Security 6 removedWebSecurityConfigurerAdapter, so declare aSecurityFilterChainbean:@Configuration
@EnableWebSecurity
public class UiSecurityConfig {
@Bean
SecurityFilterChain securityFilterChain(HttpSecurity http) throws Exception {
http
.authorizeHttpRequests(auth -> auth
.requestMatchers("/", "/login**").permitAll()
.anyRequest().authenticated())
.oauth2Login(Customizer.withDefaults());
return http.build();
}
}ロールマッピングについては、Casdoor、リソースサーバーおよび Spring Cloud Gateway からのログアウトについて、OpenID Connect を使用した Spring Boot SSO を参照してください。
-
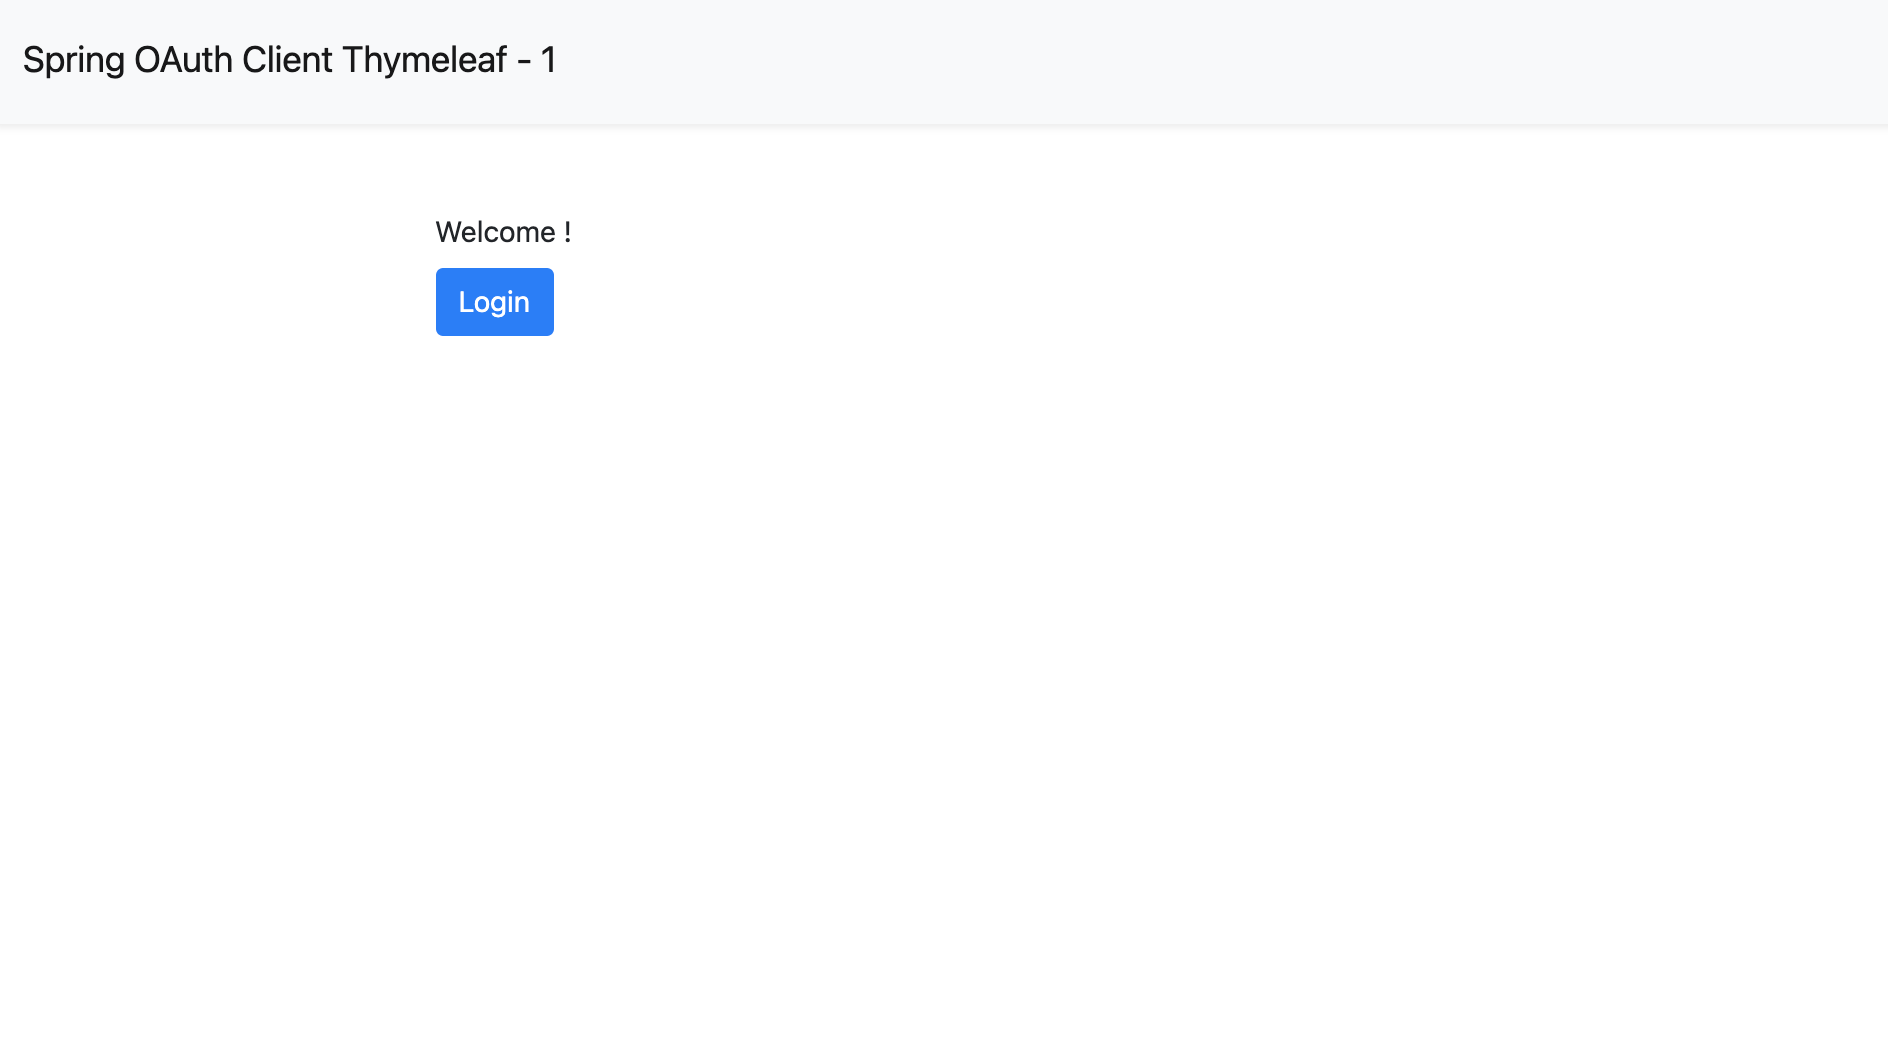
ユーザーがログインするためのシンプルなページを追加できます。
<!DOCTYPE html>
<html lang="en">
<head>
<meta http-equiv="Content-Type" content="text/html; charset=utf-8" />
<title>Spring OAuth Client Thymeleaf - 1</title>
<link rel="stylesheet"
    href="https://stackpath.bootstrapcdn.com/bootstrap/4.1.3/css/bootstrap.min.css" />
</head>
<body>
    <nav
        class="navbar navbar-expand-lg navbar-light bg-light shadow-sm p-3 mb-5">
        <a class="navbar-brand" th:href="@{/foos/}">Spring OAuth Client
            Thymeleaf - 1</a>
    </nav>
    <div class="container">
        <label>Welcome!</label> <br /> <a th:href="@{/foos/}"
            class="btn btn-primary">Login</a>
    </div>
</body>
</html>
ユーザーが
loginボタンをクリックすると、casdoorにリダイレクトされます。 -
次に、保護されたリソースを定義できます。
/foosというエンドポイントと表示用のウェブページを公開できます。Data Model
public class FooModel {
    private Long id;
    private String name;

    public FooModel(Long id, String name) {
        super();
        this.id = id;
        this.name = name;
    }
    public Long getId() {
        return id;
    }
    public void setId(Long id) {
        this.id = id;
    }
    public String getName() {
        return name;
    }
    public void setName(String name) {
        this.name = name;
    }
}
Controller
@Controller
public class FooClientController {
    @GetMapping("/foos")
    public String getFoos(Model model) {
        List<FooModel> foos = new ArrayList<>();
        foos.add(new FooModel(1L, "a"));
        foos.add(new FooModel(2L, "b"));
        foos.add(new FooModel(3L, "c"));
        model.addAttribute("foos", foos);
        return "foos";
    }
}
Web page
<!DOCTYPE html>
<html lang="en">
<head>
<meta http-equiv="Content-Type" content="text/html; charset=utf-8" />
<title>Spring OAuth Client Thymeleaf - 1</title>
<link rel="stylesheet"
href="https://stackpath.bootstrapcdn.com/bootstrap/4.1.3/css/bootstrap.min.css" />
</head>
<body>
<nav
class="navbar navbar-expand-lg navbar-light bg-light shadow-sm p-3 mb-5">
<a class="navbar-brand" th:href="@{/foos/}">Spring OAuth Client
Thymeleaf -1</a>
<ul class="navbar-nav ml-auto">
<li class="navbar-text">Hi, <span sec:authentication="name">preferred_username</span> </li>
</ul>
</nav>
<div class="container">
<h1>All Foos:</h1>
<table class="table table-bordered table-striped">
<thead>
<tr>
<td>ID</td>
<td>Name</td>
</tr>
</thead>
<tbody>
<tr th:if="${foos.empty}">
<td colspan="4">No foos</td>
</tr>
<tr th:each="foo : ${foos}">
<td>
<span th:text="${foo.id}">ID</span>
</td>
<td>
<span th:text="${foo.name}">Name</span>
</td>
</tr>
</tbody>
</table>
</div>
</body>
</html>
すべてのウェブページのテンプレートは resources/templates 下に配置する必要があります。
Step 5: Try the demo!
ブラウザで /foos を開くと、Casdoor のログインページにリダイレクトされます。そこで、またはルートページからサインインしてください。
ルートページを訪問すると、Casdoor Application Setting が表示されます。
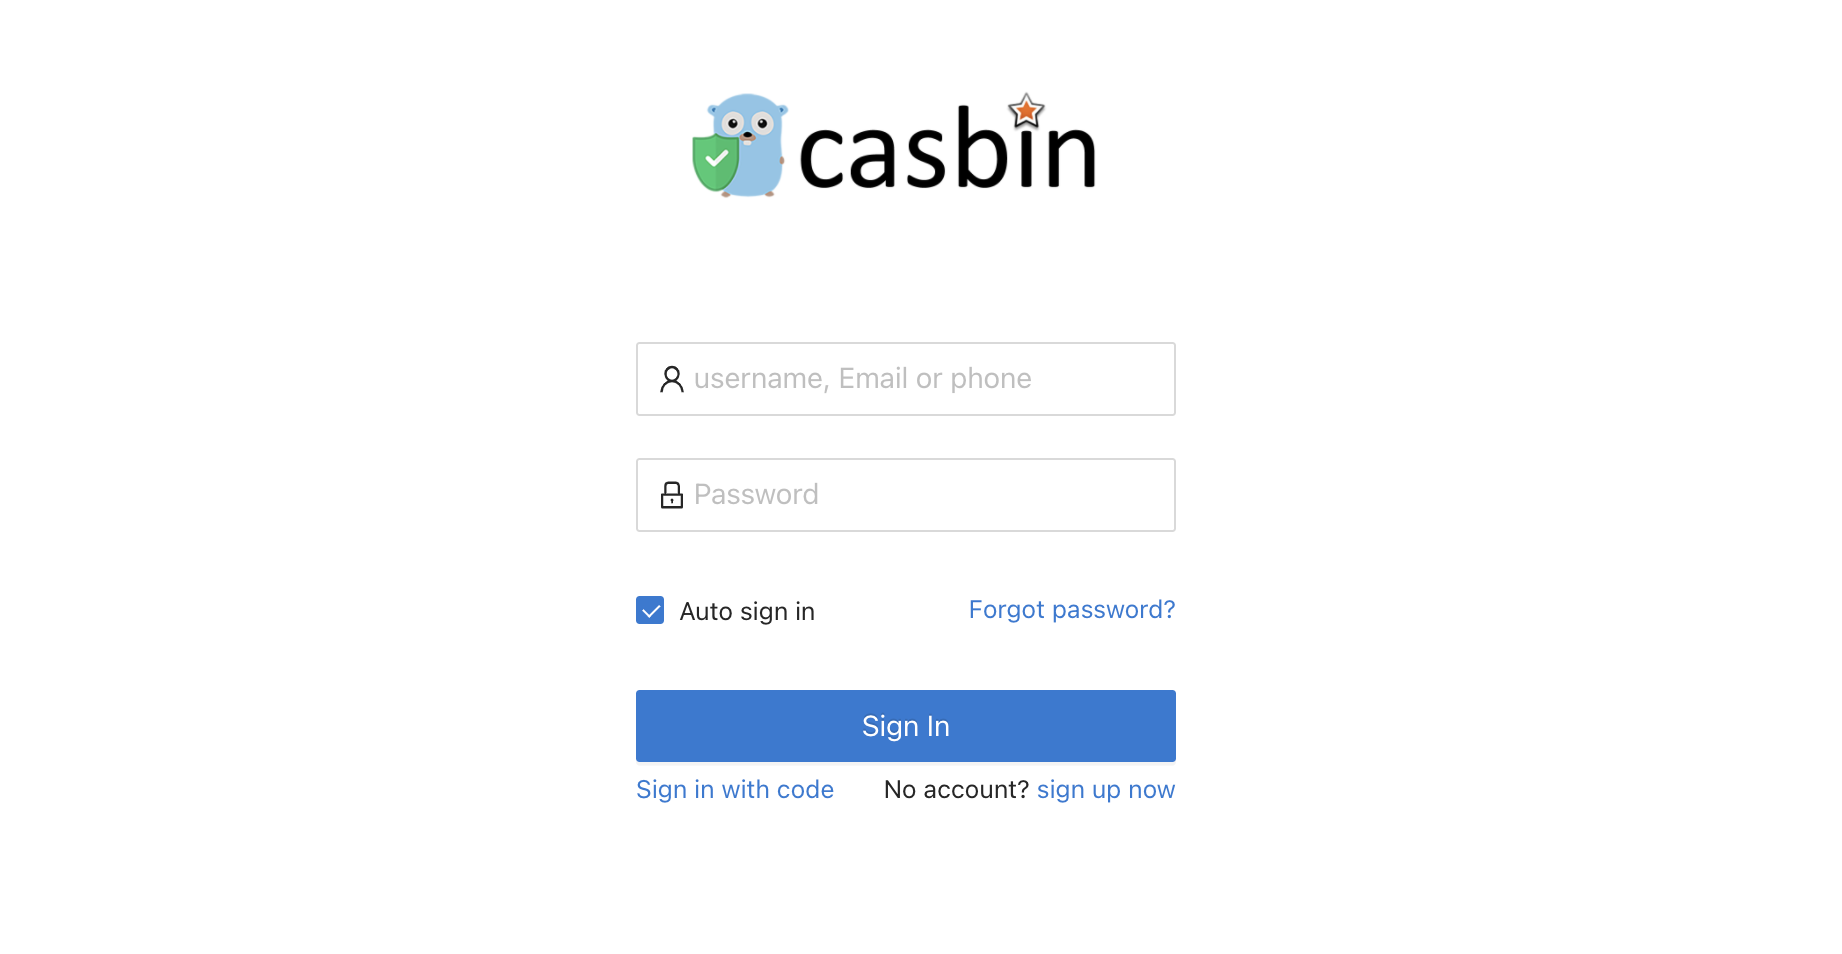
Click the login button and the page will redirect you to Casdoor's login page.
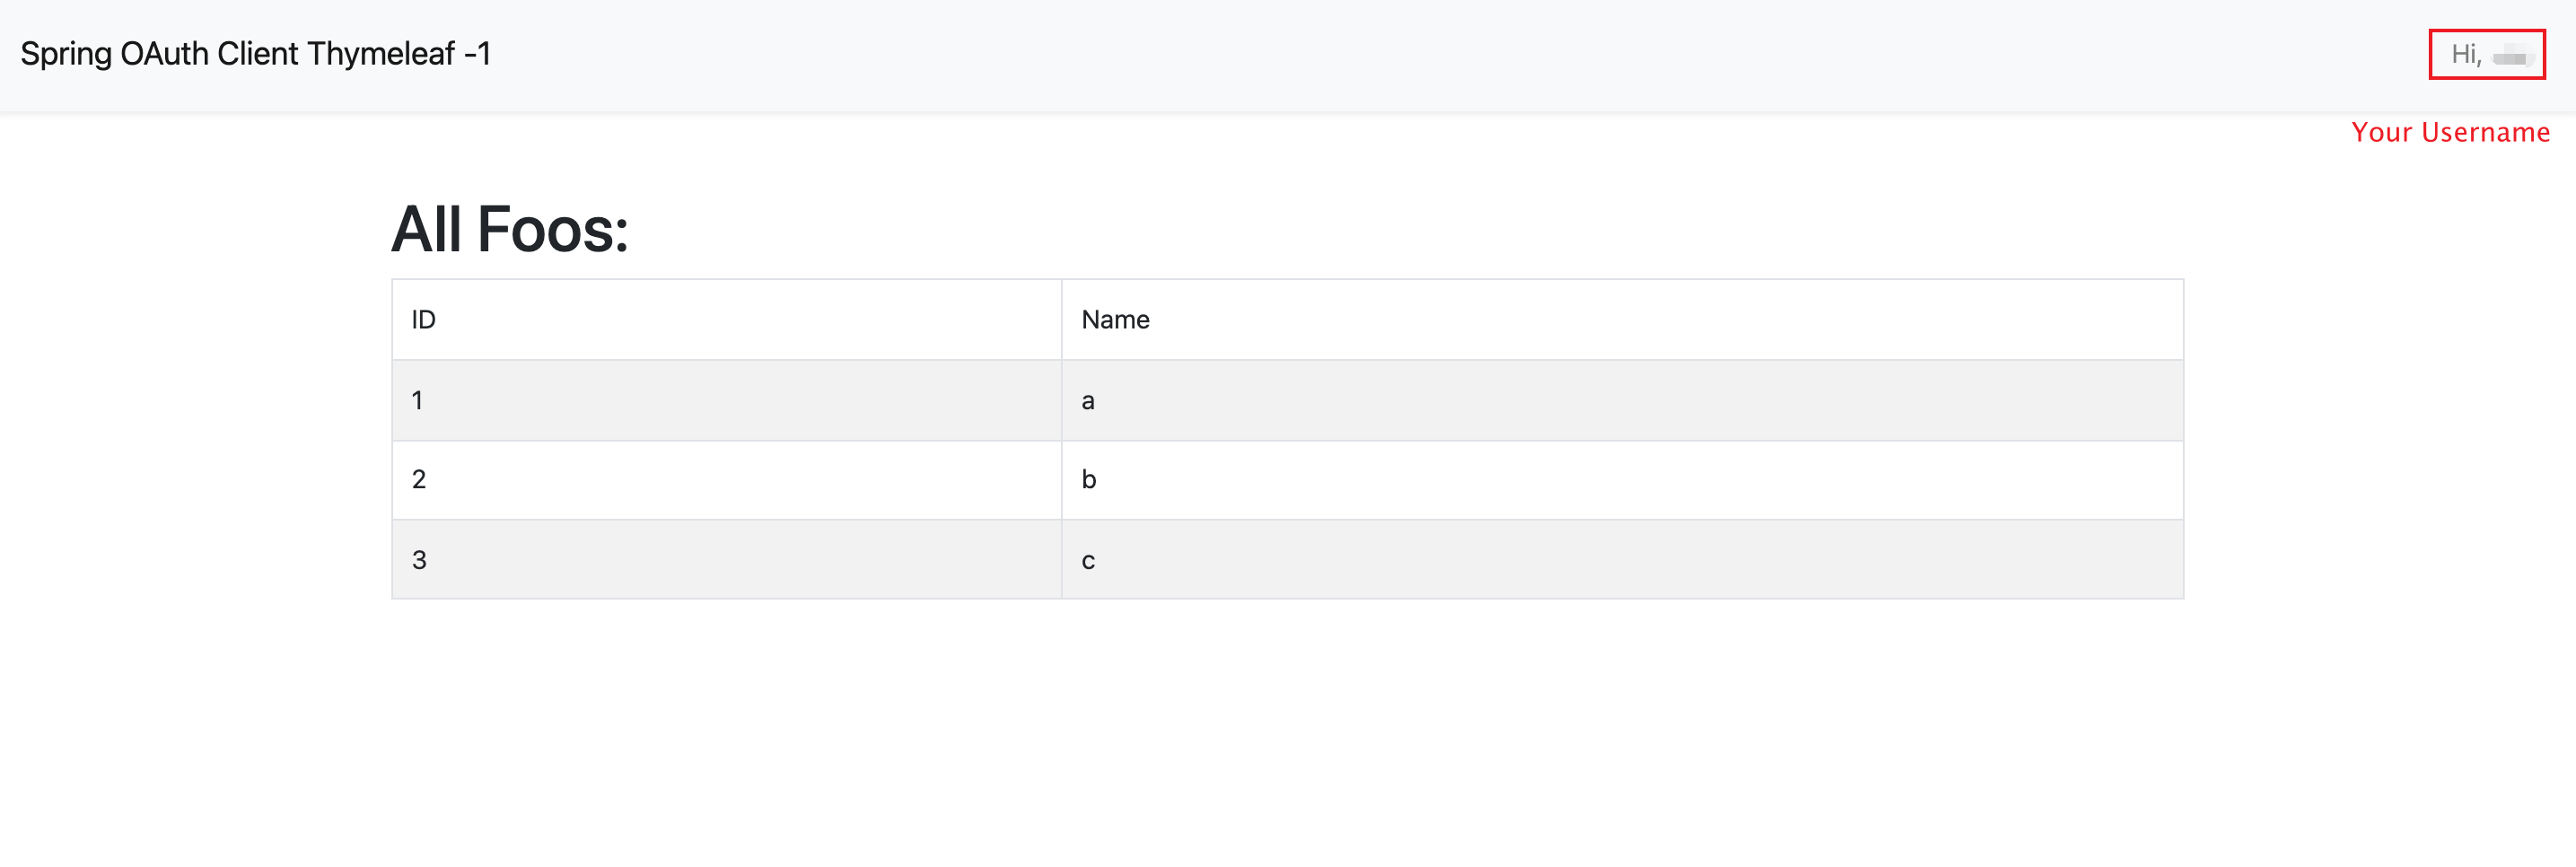
ログイン後、ページは /foos へリダイレクトされます。