Sign users in with a Casdoor SDK
This guide lists the Casdoor SDKs and explains how to sign users in to a web application with a frontend SDK and a backend SDK. The examples use casdoor-js-sdk and casdoor-go-sdk. The other SDKs follow the same steps.
Learning outcomes
- Choose the SDKs for your platform.
- Configure the backend SDK and the frontend SDK.
- Exchange the authorization code for an access token and verify the token.
- Keep the user signed in to your application.
- Manage users and applications through the SDK.
What you need
- A running Casdoor instance
- An application in Casdoor, with the callback URL of your application in Redirect URLs
- The client ID and client secret of the application, and the public key of its certificate
About the SDKs
The Casdoor SDKs build on OpenID Connect (OIDC) and add functions of the Casdoor API, such as user management and file upload. They need a little more setup than a standard OIDC client and give you the full Casdoor API.
- Frontend SDKs: For web frontends, mobile apps, and desktop apps. They build the sign-in URL and handle the callback in the UI.
- Backend SDKs: For your server. They exchange the authorization code, verify tokens, and call the Casdoor API.
If your application has a separate frontend and backend, use a frontend SDK in the UI and a backend SDK on the server. For an example, see casdoor-python-vue-sdk-example. If your application renders pages on the server, as JSP and PHP applications do, a backend SDK alone can be enough.
Choose an SDK
All official SDKs are in the casdoor organization on GitHub.
Web frontend SDKs
| SDK para frontend Web | Descrição | Código do SDK | Código de exemplo |
|---|---|---|---|
| SDK para Javascript | Para sites tradicionais não-SPA | casdoor-js-sdk | Nodejs backend: casdoor-raw-js-example Go backend: casdoor-go-react-sdk-example |
| SDK apenas para Frontend | Para sites SPA apenas de frontend | casdoor-js-sdk | casdoor-react-only-example |
| SDK para React | Para sites React | casdoor-react-sdk | Nodejs backend: casdoor-nodejs-react-example Java backend: casdoor-spring-security-react-example |
| SDK para Next.js | Para sites Next.js | nextjs-auth | |
| SDK para Nuxt | Para sites Nuxt | nuxt-auth | |
| Vue SDK | For Vue websites | casdoor-vue-sdk | casdoor-python-vue-sdk-example |
| Angular SDK | For Angular websites | casdoor-angular-sdk | casdoor-nodejs-angular-example |
| SDK Flutter | For Flutter Web websites | casdoor-flutter-sdk | casdoor-flutter-example |
| ASP.NET SDK | For ASP.NET Blazor WASM websites | Blazor.BFF.OpenIDConnect.Template | casdoor-dotnet-blazorwasm-oidc-example |
| SDK para Firebase | Para aplicativos Google Firebase | casdoor-firebase-example |
Web backend SDKs
| SDK para backend Web | Descrição | Código do SDK | Código de exemplo |
|---|---|---|---|
| SDK para Go | Para backends Go | casdoor-go-sdk | casdoor-go-react-sdk-example |
| SDK para Java | Para backends Java | casdoor-java-sdk | casdoor-spring-boot-starter, casdoor-spring-boot-example, casdoor-spring-security-react-example, quarkus-casdoor-auth (Quarkus) |
| SDK para Node.js | Para backends Node.js | casdoor-nodejs-sdk | casdoor-nodejs-react-example |
| SDK para Python | Para backends Python | casdoor-python-sdk | Flask: casdoor-python-vue-sdk-example Django: casdoor-django-js-sdk-example FastAPI: casdoor-fastapi-js-sdk-example |
| SDK para PHP | Para backends PHP | casdoor-php-sdk | wordpress-casdoor-plugin |
| SDK para .NET | Para backends ASP.NET | casdoor-dotnet-sdk | casdoor-dotnet-sdk-example |
| SDK para Rust | Para backends Rust | casdoor-rust-sdk | casdoor-rust-example |
| SDK para C/C++ | Para backends C/C++ | casdoor-cpp-sdk | casdoor-cpp-qt-example |
| SDK para Dart | Para backends Dart | casdoor-dart-sdk | |
| SDK para Ruby | Para backends Ruby | casdoor-ruby-sdk |
Mobile SDKs
| SDK Móvel | Descrição | Código do SDK | Código de exemplo |
|---|---|---|---|
| SDK Android | Para aplicativos Android | casdoor-android-sdk | casdoor-android-example |
| SDK iOS | Para aplicativos iOS | casdoor-ios-sdk | casdoor-ios-example |
| SDK para React Native | Para aplicativos React Native | casdoor-react-native-sdk | casdoor-react-native-example |
| SDK Flutter | Para aplicativos Flutter | casdoor-flutter-sdk | casdoor-flutter-example |
| SDK para Firebase | Para aplicativos Google Firebase | casdoor-firebase-example | |
| SDK para Jogos Unity | Para jogos Unity 2D/3D PC/Mobile | casdoor-dotnet-sdk | casdoor-unity-example |
| SDK para uni-app | Para aplicativos uni-app | casdoor-uniapp-sdk | casdoor-uniapp-example |
A mobile app that signs users in natively, without a browser, can use the verification code grant for sign-in by SMS or email with automatic sign-up. Signed-in users can also approve the QR code on the sign-in page of your website from the app.
Desktop SDKs
| SDK para Desktop | Descrição | Código do SDK | Código de exemplo |
|---|---|---|---|
| SDK para Electron | Para aplicativos Electron | casdoor-js-sdk | casdoor-electron-example |
| SDK para .NET Desktop | Para aplicativos de desktop .NET | casdoor-dotnet-sdk | WPF: casdoor-dotnet-desktop-example WinForms: casdoor-dotnet-winform-example Avalonia UI: casdoor-dotnet-avalonia-example |
| SDK para C/C++ | Para aplicativos de desktop C/C++ | casdoor-cpp-sdk | casdoor-cpp-qt-example |
Configure the backend SDK
When your backend starts, initialize the SDK with the address of Casdoor and the credentials of the application. With casdoor-go-sdk:
var CasdoorEndpoint = "https://door.casdoor.com"
var ClientId = "541738959670d221d59d"
var ClientSecret = "66863369a64a5863827cf949bab70ed560ba24bf"
var CasdoorOrganization = "casbin"
var CasdoorApplication = "app-casnode"

//go:embed token_jwt_key.pem
var JwtPublicKey string

func init() {
    auth.InitConfig(CasdoorEndpoint, ClientId, ClientSecret, JwtPublicKey, CasdoorOrganization, CasdoorApplication)
}
InitConfig() takes the following parameters:
| Parâmetro | Obrigatório | Descrição |
|---|---|---|
| ponto de extremidade | Sim | Casdoor Server URL, like https://door.casdoor.com or http://localhost:8000 |
| clientId | Sim | ID do Cliente para a aplicação Casdoor |
| clientSecret | Sim | Segredo do Cliente para a aplicação Casdoor |
| jwtPublicKey | Sim | A chave pública para o certificado da aplicação Casdoor |
| organizationName | Sim | O nome da organização Casdoor |
| applicationName | Não | O nome da aplicação Casdoor |
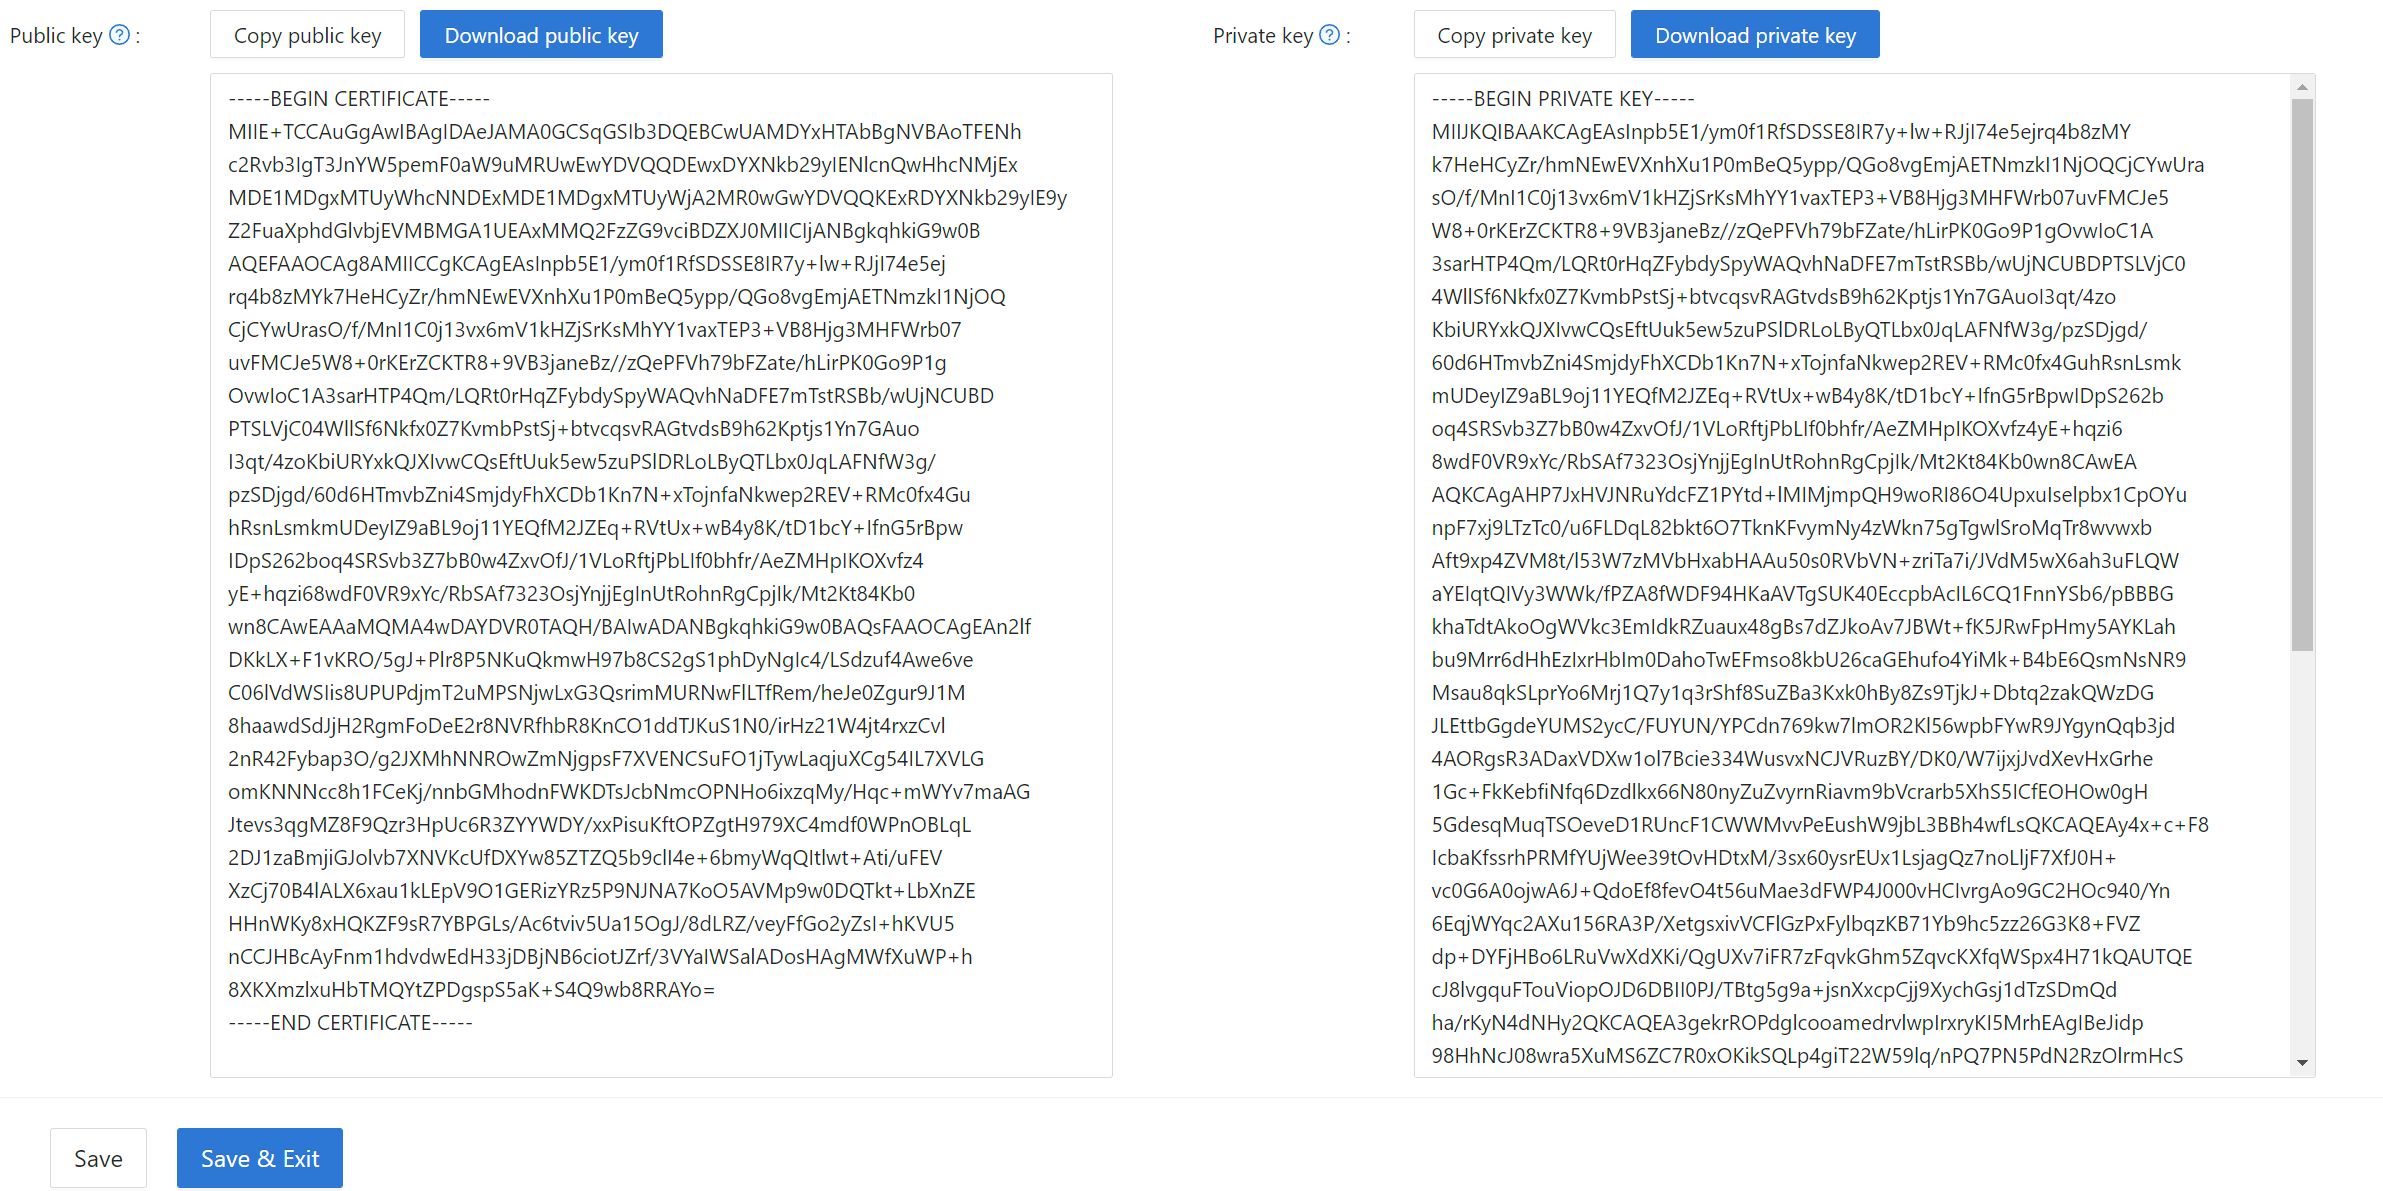
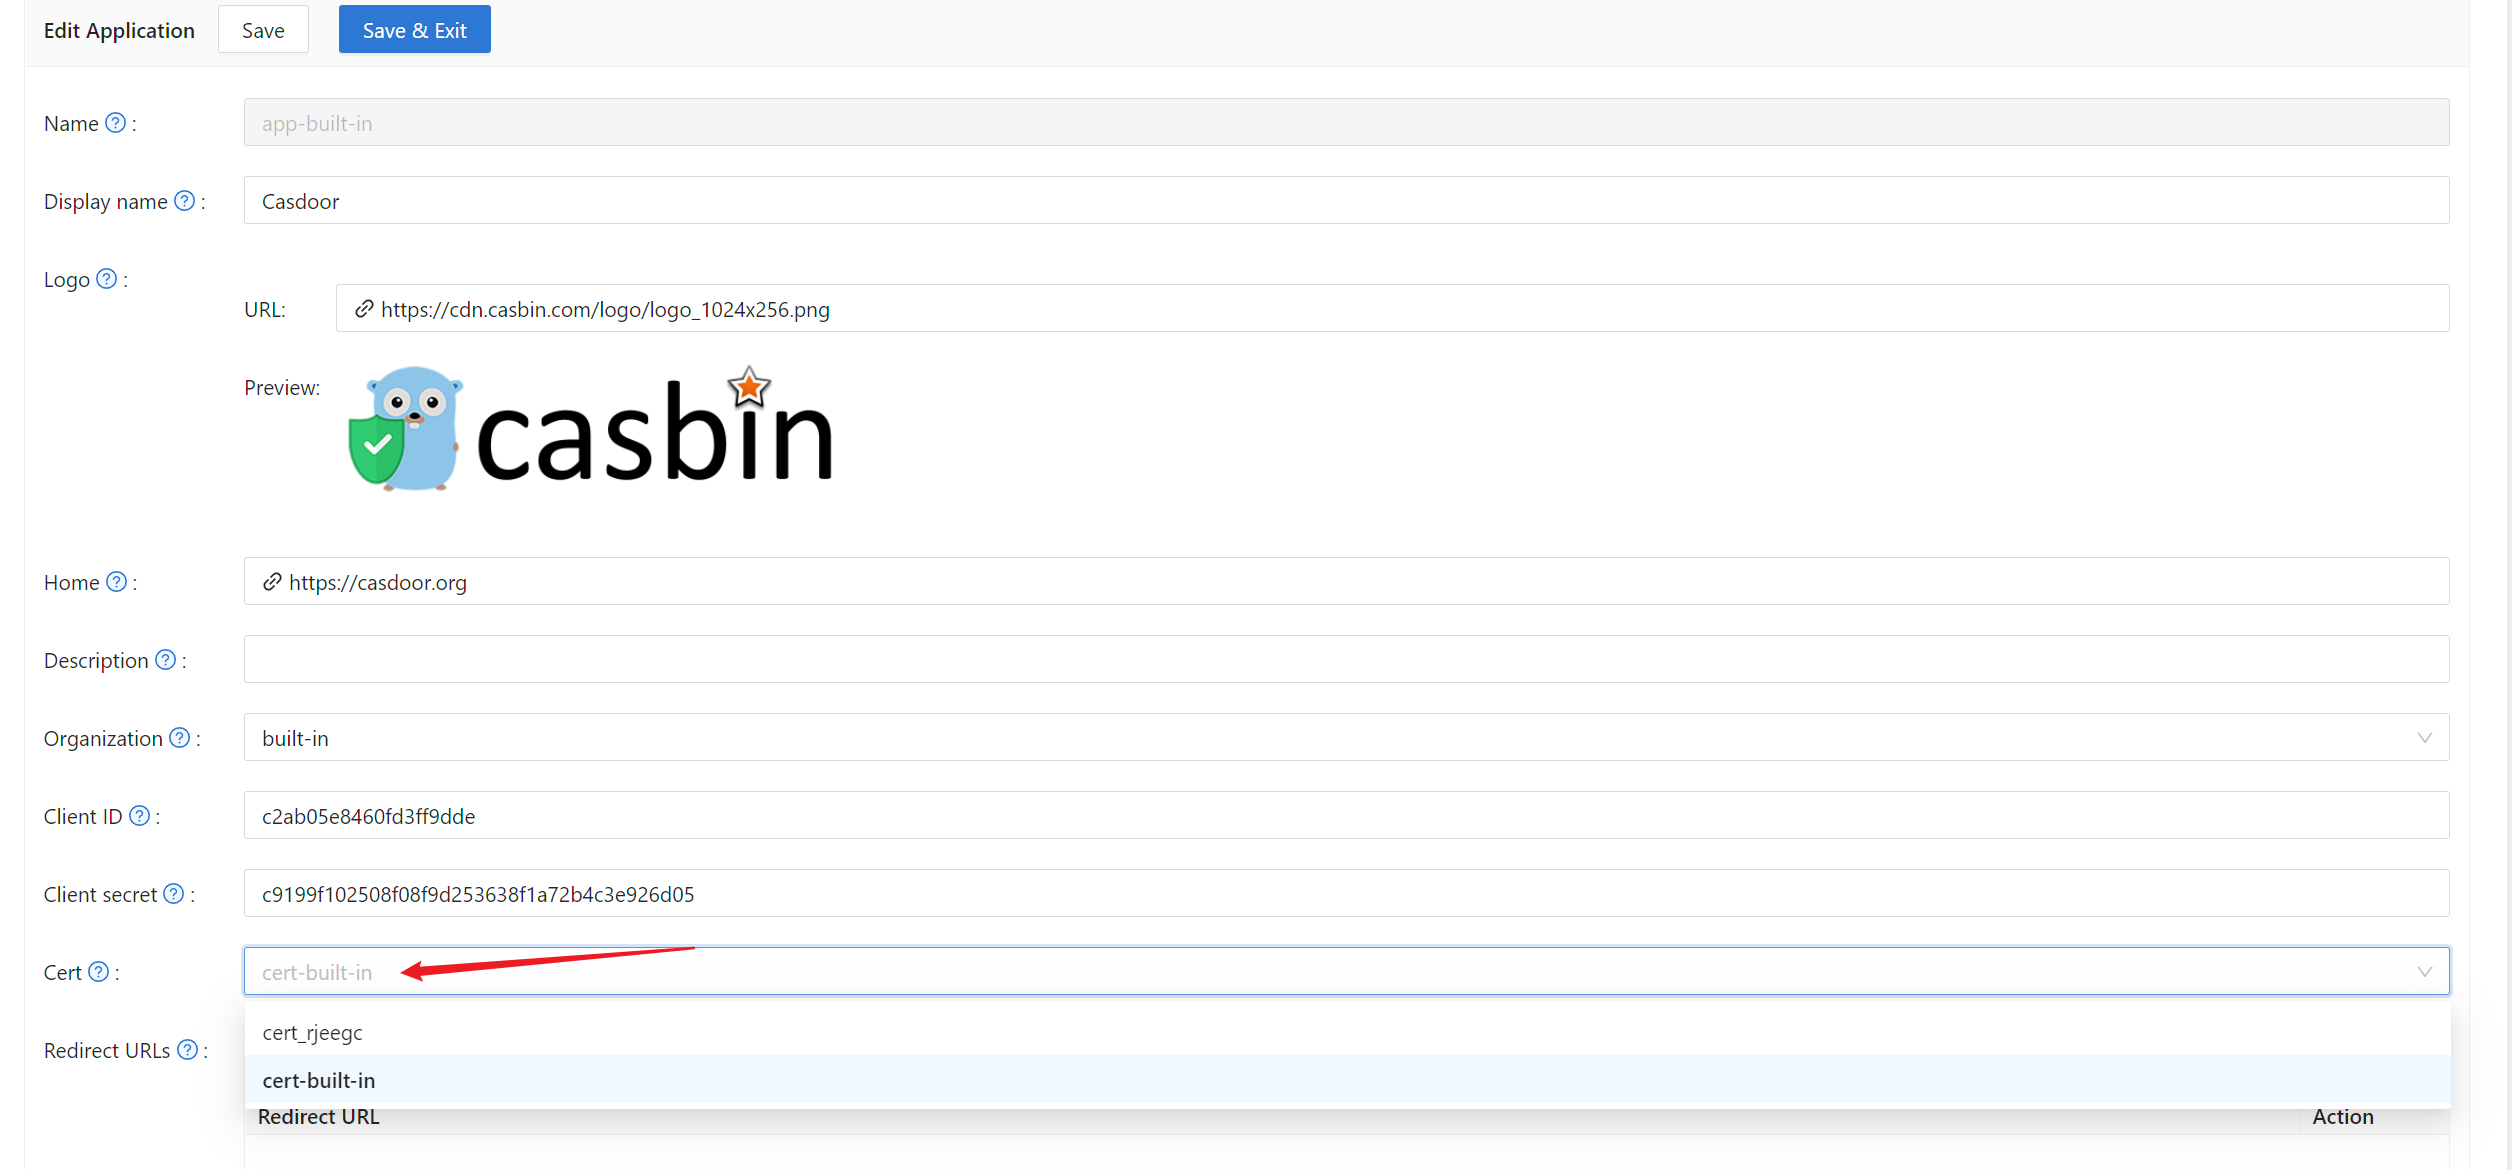
To get the value of jwtPublicKey:
-
In the Casdoor admin console, open the Certs page.

-
Open the certificate and copy or download its public key.
-
On the edit page of the application, select the same certificate in Cert.
Configure the frontend SDK
-
Install
casdoor-js-sdkwith npm:npm install casdoor-js-sdkOr with Yarn:
yarn add casdoor-js-sdk -
Define helper functions in a shared file, such as
Setting.js:import Sdk from "casdoor-js-sdk";
export function initCasdoorSdk(config) {
CasdoorSdk = new Sdk(config);
}
export function getSignupUrl() {
return CasdoorSdk.getSignupUrl();
}
export function getSigninUrl() {
return CasdoorSdk.getSigninUrl();
}
export function getUserProfileUrl(userName, account) {
return CasdoorSdk.getUserProfileUrl(userName, account);
}
export function getMyProfileUrl(account) {
return CasdoorSdk.getMyProfileUrl(account);
}
export function getMyResourcesUrl(account) {
return CasdoorSdk.getMyProfileUrl(account).replace("/account?", "/resources?");
}
export function signin() {
return CasdoorSdk.signin(ServerUrl);
}
export function showMessage(type, text) {
if (type === "") {
return;
} else if (type === "success") {
message.success(text);
} else if (type === "error") {
message.error(text);
}
}
export function goToLink(link) {
window.location.href = link;
} -
In the entry file of the frontend, such as
index.jsorapp.jsin React, initialize the SDK. Use the same values for the first four settings as in the backend SDK.redirectPathis the path of your application that Casdoor sends the user back to after sign-in.const config = {
serverUrl: "https://door.casdoor.com",
clientId: "014ae4bd048734ca2dea",
organizationName: "casbin",
appName: "app-casnode",
redirectPath: "/callback",
};
xxx.initCasdoorSdk(config); -
Handle the callback route. In this React example, a component handles
/callbackand forwards the code to the backend. Skip this step if Casdoor redirects straight to your backend, as in JSP and PHP applications.import React from "react";
import {Button, Result, Spin} from "antd";
import {withRouter} from "react-router-dom";
import * as Setting from "./Setting";
class AuthCallback extends React.Component {
constructor(props) {
super(props);
this.state = {
classes: props,
msg: null,
};
}
componentWillMount() {
this.login();
}
login() {
Setting.signin().then((res) => {
if (res.status === "ok") {
Setting.showMessage("success", `Logged in successfully`);
Setting.goToLink("/");
} else {
this.setState({
msg: res.msg,
});
}
});
}
render() {
return (
<div style={{textAlign: "center"}}>
{this.state.msg === null ? (
<Spin
size="large"
tip="Signing in..."
style={{paddingTop: "10%"}}
/>
) : (
<div style={{display: "inline"}}>
<Result
status="error"
title="Login Error"
subTitle={this.state.msg}
extra={[
<Button type="primary" key="details">
Details
</Button>,
<Button key="help">Help</Button>,
]}
/>
</div>
)}
</div>
);
}
}
export default withRouter(AuthCallback);
Show the sign-in and sign-up links
Give users a Sign in and a Sign up button or link. Get the URLs from the frontend SDK or the backend SDK. See Sign-in and sign-up URLs.
Get and verify the access token
The sign-in flow has three steps:
-
The user clicks the sign-in link and arrives at the Casdoor sign-in page, for example:
https://door.casdoor.com/login/oauth/authorize?client_id=014ae4bd048734ca2dea&response_type=code&redirect_uri=https%3A%2F%2Fforum.casbin.com%2Fcallback&scope=read&state=app-casnode -
The user enters a username and password and clicks Sign In, or clicks the button of a provider, such as the GitHub button.
-
Casdoor redirects the user to your application with an authorization code, for example
https://forum.casbin.com?code=xxx&state=yyy.
Your backend then exchanges the code for an access token with GetOAuthToken() and verifies the token with ParseJwtToken():
// get code and state from the GET parameters of the redirected URL
code := c.Input().Get("code")
state := c.Input().Get("state")

// exchange the access token with code and state
token, err := auth.GetOAuthToken(code, state)
if err != nil {
    panic(err)
}

// verify the access token
claims, err := auth.ParseJwtToken(token.AccessToken)
if err != nil {
    panic(err)
}
If ParseJwtToken() returns no error, the token is valid and Casdoor issued it. The user is signed in. Use the returned claims to identify the user. For a complete example, see the sign-in handler of Casnode, a forum written in Go.
Keep the user signed in
How your application remembers the user is your own design decision and not part of OIDC, OAuth 2.0, or Casdoor. This section describes two common ways.
The claims that ParseJwtToken() returns have the following type:
type Claims struct {
    User
    AccessToken string `json:"accessToken"`
    jwt.RegisteredClaims
}
| Field | Description |
|---|---|
User | The user, with all profile fields. See User |
AccessToken | The access token string |
jwt.RegisteredClaims | The standard claims of a JSON Web Token (JWT) |
In Casdoor, the access token usually has the same content as the ID token, so it carries the information about the signed-in user.
Use a server-side session
Store the claims in the session of your web framework. How you do that depends on the language and the framework. Casnode uses the Beego framework and stores the user with c.SetSessionUser():
token, err := auth.GetOAuthToken(code, state)
if err != nil {
    panic(err)
}

claims, err := auth.ParseJwtToken(token.AccessToken)
if err != nil {
    panic(err)
}

claims.AccessToken = token.AccessToken
c.SetSessionUser(claims) // set session
Use the access token as a JWT
The access token is a JWT. If your application keeps sessions in JWTs, use the access token directly:
- Send the access token to the frontend and store it there, for example in the
localStorageof the browser. - Send the access token to the backend with every request.
- In the backend, verify the token with
ParseJwtToken()or your own function, and read the signed-in user from it.
Manage users through the SDK
The backend SDKs wrap the Casdoor API. This part is not OIDC or OAuth 2.0. The functions include:
| Function | Description |
|---|---|
GetUser(name string) | Gets a user by username |
GetUsers() | Gets all users |
AddUser() | Adds a user |
UpdateUser() | Updates a user |
DeleteUser() | Deletes a user |
CheckUserPassword(auth.User) | Checks the password of a user |
If the SDK has no function for an endpoint, call the Casdoor API directly.
Manage applications through the SDK
| Function | Description |
|---|---|
AddApplication() | Creates an application |
GetApplication(name string) | Gets an application by name |
GetApplications() | Gets all applications |
UpdateApplication() | Updates an application |
DeleteApplication() | Deletes an application |
When you create an application with AddApplication(), Casdoor fills in the default sign-up items (ID, Username, Display name, Password, Confirm password, Email, Phone, Agreement), sign-in items, and sign-in methods. The application works in the UI without further configuration.