Send email with SendGrid
This guide explains how to send the emails of Casdoor through the API of SendGrid.
Learning outcomes
- Create a SendGrid API key and verify a sender.
- Add SendGrid as an email provider in Casdoor and test it.
What you need
- A SendGrid account
- Administrator access to the Casdoor admin console
Prepare SendGrid
-
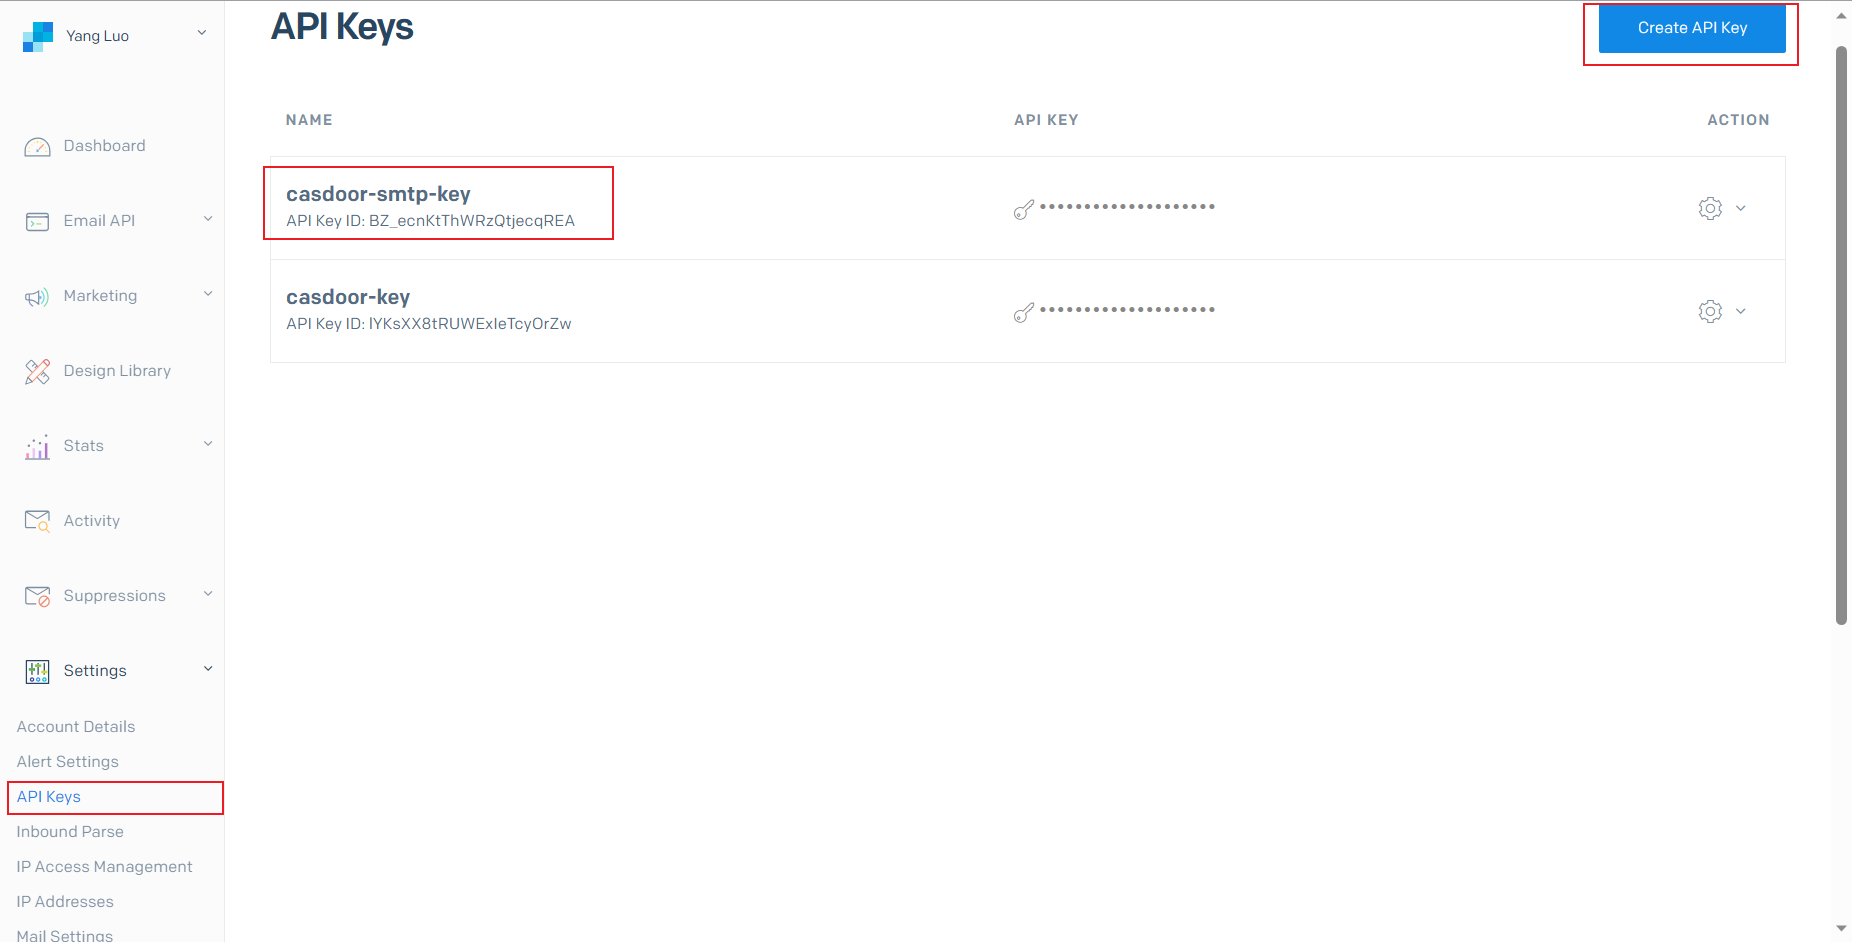
In the SendGrid dashboard, go to Settings > API Keys, click Create API Key, and select the permissions that you need. Copy the key.
-
Verify your sender with Single Sender Verification or Domain Authentication. See Sender Identity.
Add the provider in Casdoor
-
In the Casdoor admin console, go to Identity > Providers and add a provider.
-
Set Category to
Emailand Type toSendGrid. -
Fill in the required fields:
Поле Опис Secret Key Your SendGrid API key Адреса відправника Verified sender email or domain -
Optionally, change the defaults:
Поле За замовчуванням Кінцева точка /v3/mail/sendХост https://api.sendgrid.com -
Optionally, fill in the remaining fields:
Поле Опис From Name Sender display name Email Title Тема Email Content Body (HTML supported) Перевірити електронну пошту Recipient for Send Testing Email 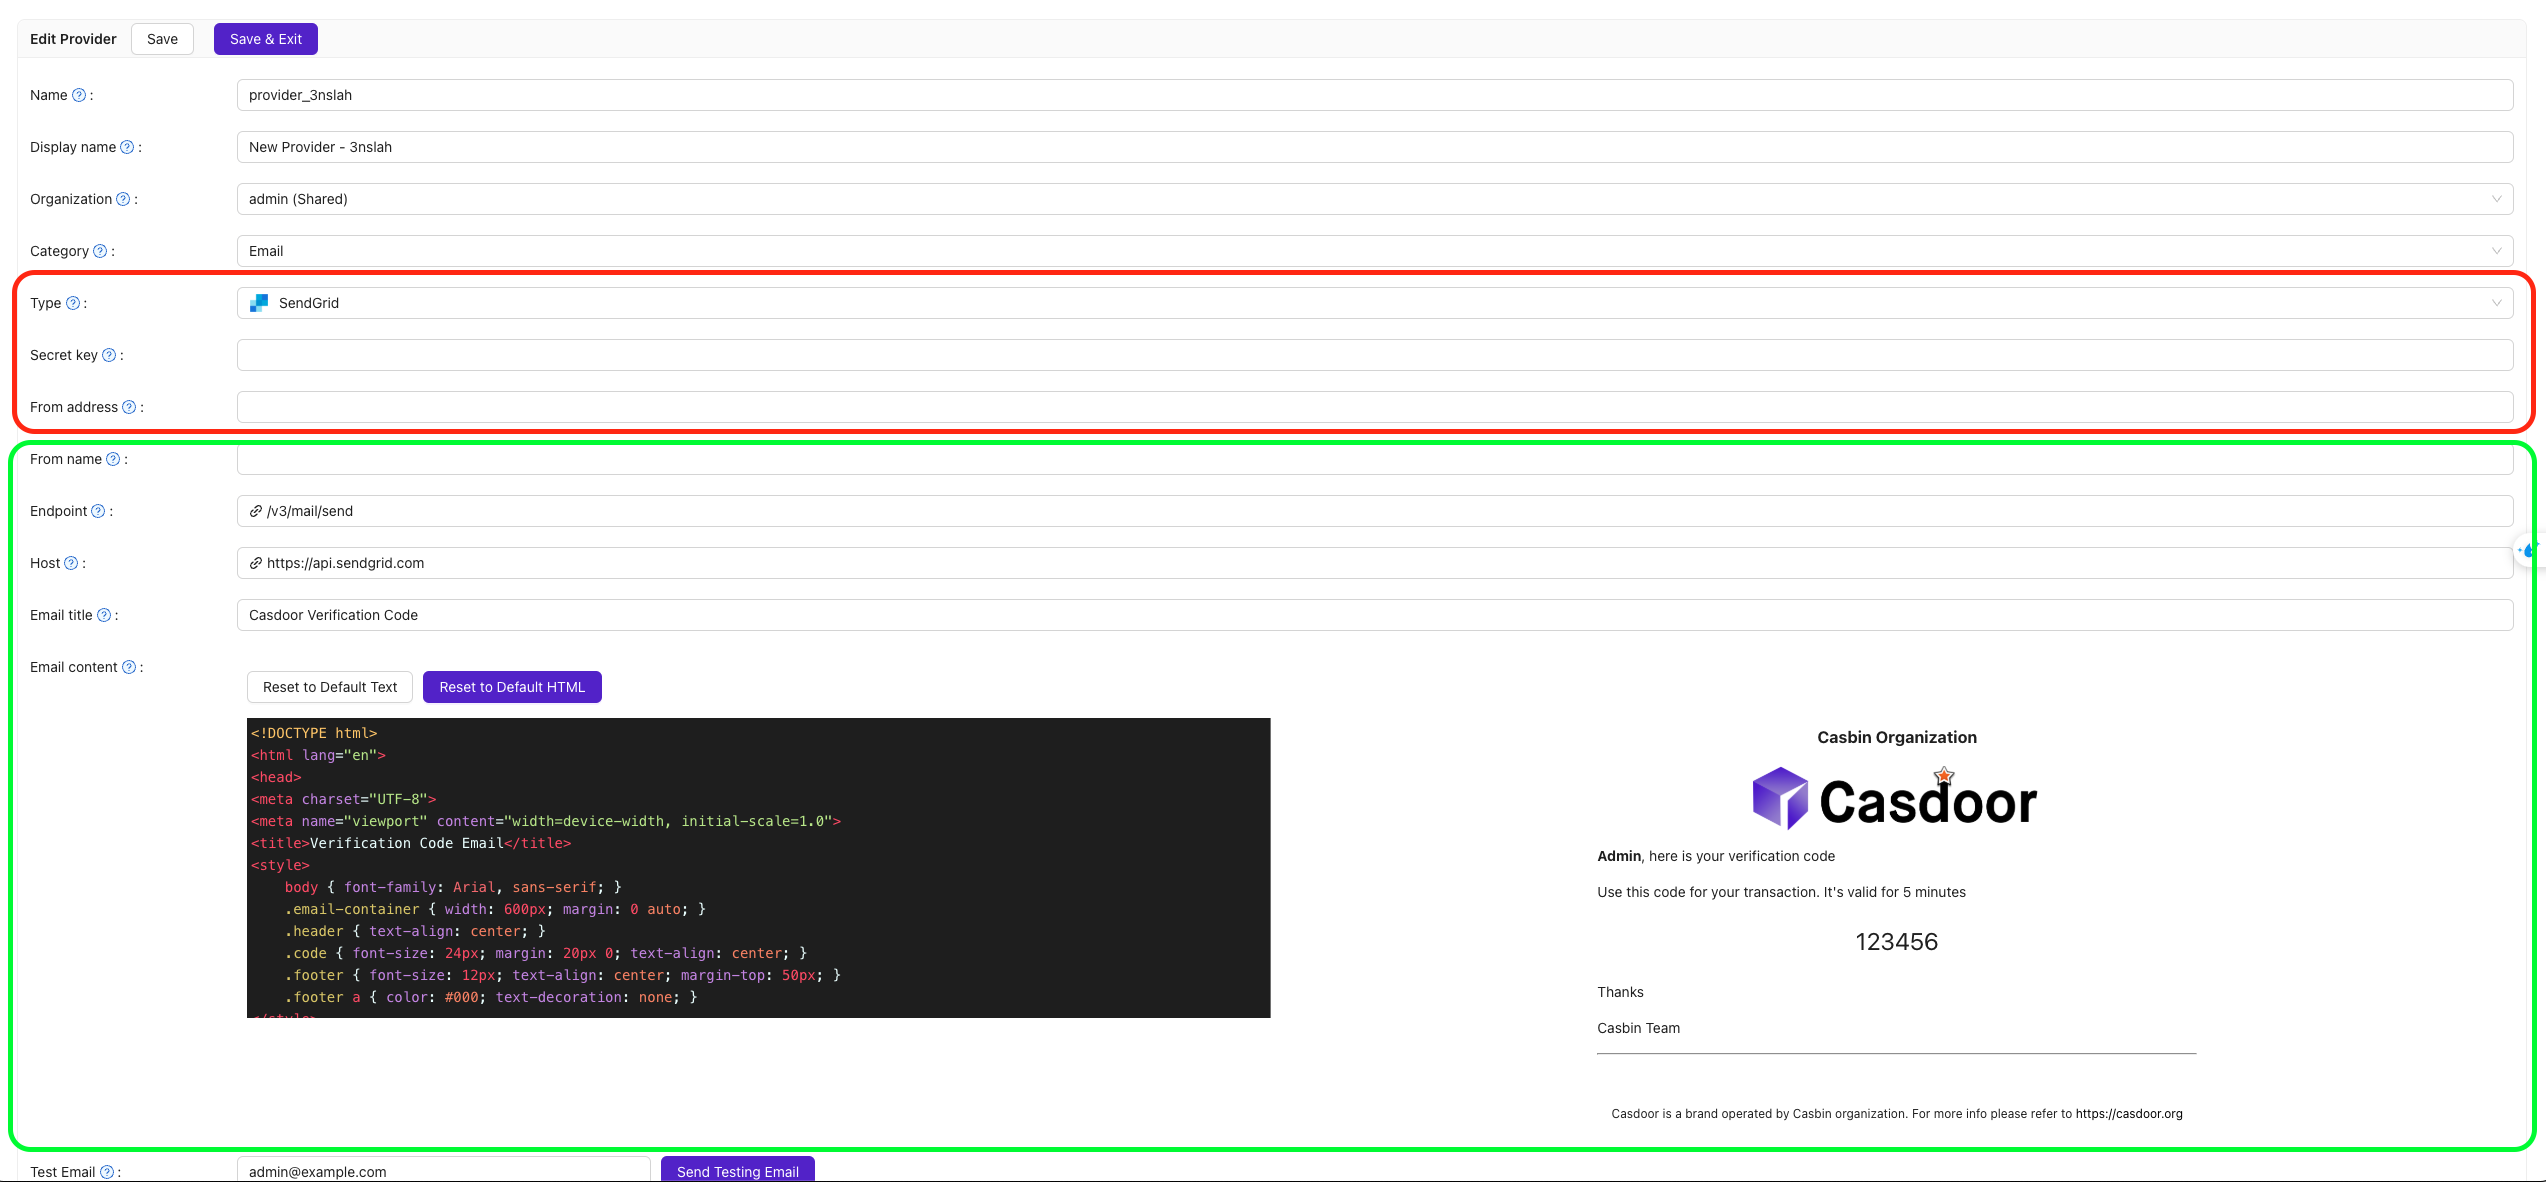
-
Save the provider.
Verify the result
Click Send Testing Email and check that the message arrives at the Test Email address.