WordPress (CAS SSO)
This guide configures CAS-based SSO for WordPress using wp-cassify and Casdoor as the CAS server.
Step 1: Deploy Casdoor and WordPress
Deploy Casdoor
Install Casdoor. After deployment:
- Access the Casdoor web UI via its public/private URL (e.g.,
http://<casdoor-server-ip>:8000). - Log in with the default admin credentials (or your custom credentials set during deployment).
- Confirm the dashboard works (e.g. open Applications, Users) so Casdoor is ready as the CAS IdP.
Deploy WordPress
Deploy WordPress using your preferred method:
- Docker: Use the official WordPress Docker image for quick setup (see WordPress Docker Docs).
- Traditional Hosting: Install WordPress on a LAMP/LEMP stack (follow WordPress Official Installation).
- Access the WordPress site via its URL (e.g.,
http://<wordpress-server-ip>). - Complete the initial WordPress setup (create an admin account, site title).
- Log in to the WordPress Admin Dashboard (
http://<wordpress-server-ip>/wp-admin) to confirm functionality.
Step 2: Create a Casdoor application
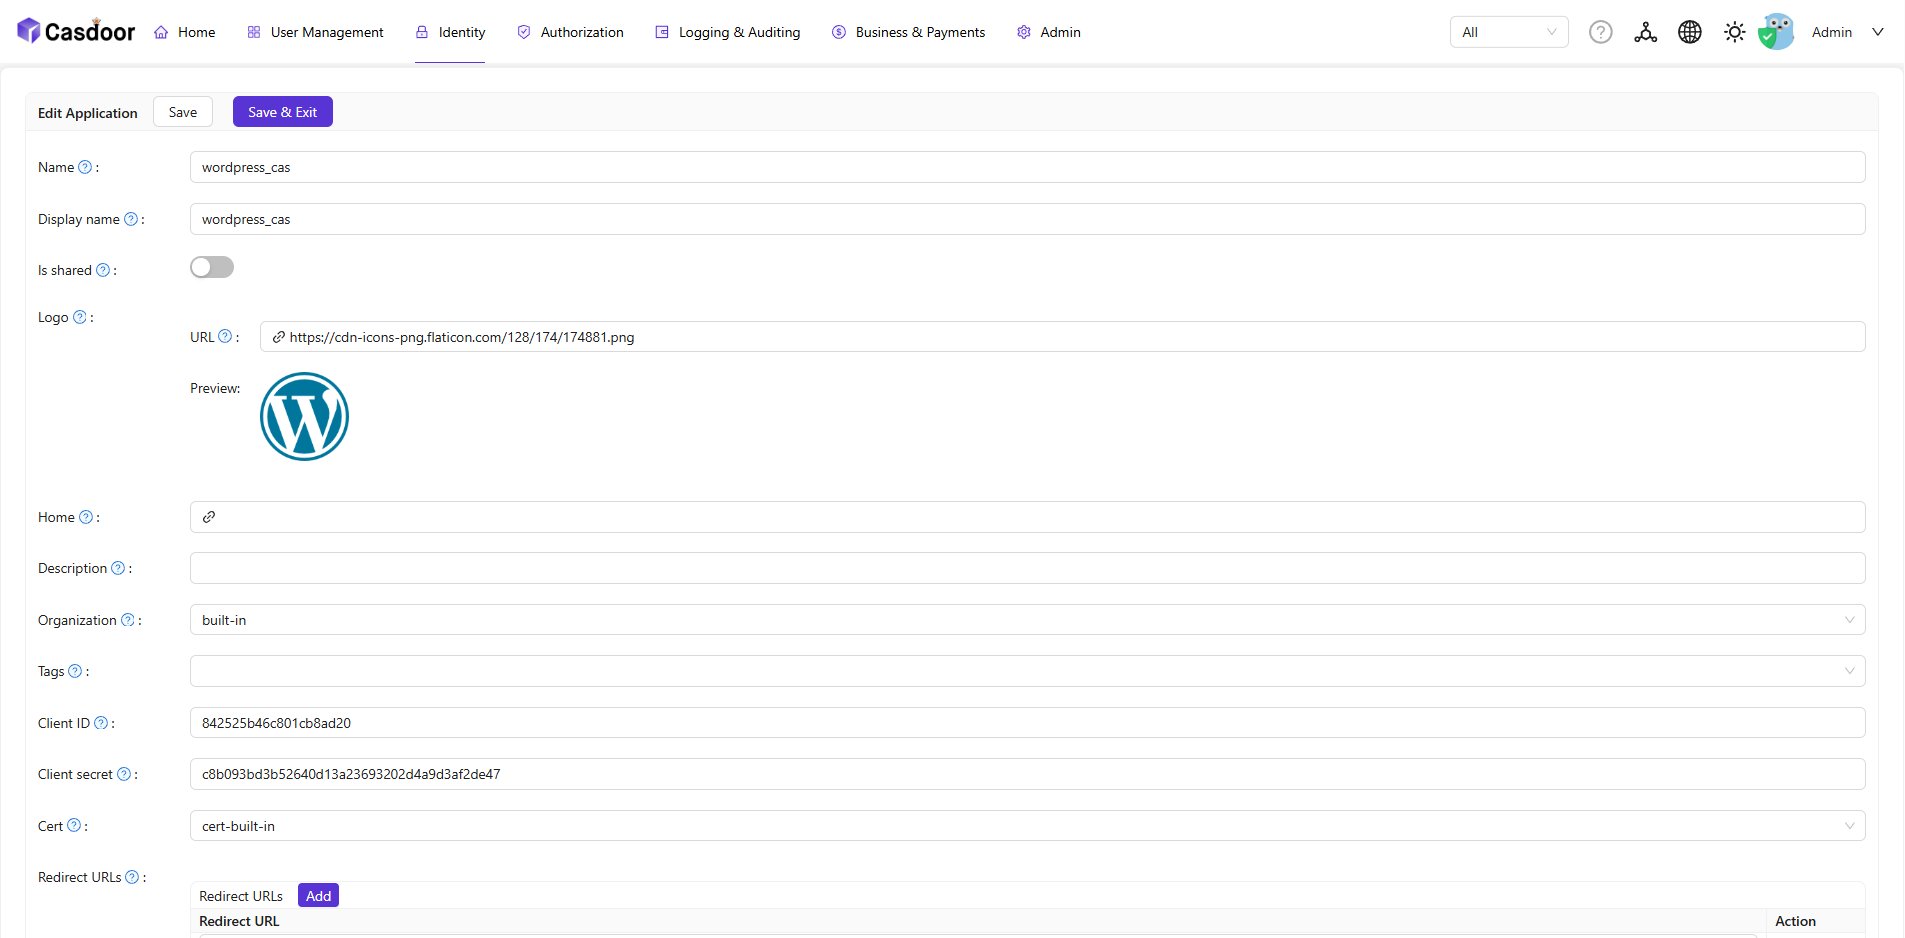
Create an application in Casdoor to act as the CAS bridge for WordPress:
- Log in to the Casdoor Admin Dashboard.
- Navigate to Applications > Add Application
- Click Save to create the application.
Step 3: Configure wp-cassify
Install the plugin
- Log in to the WordPress Admin Dashboard (
http://<wordpress-server-ip>/wp-admin). - Navigate to Plugins > Add New.
- In the search bar, type "wp-cassify" and select the plugin by "wp-cassify".
- Click Install Now, then Activate to enable the plugin.
Configure settings
-
In the WordPress Admin Dashboard, navigate to Settings > WP-Cassify (the plugin’s configuration page).
-
Configure User General Settings.
wp-cassify Setting Value to Enter CAS Server Base URLYour Casdoor CAS endpoint (e.g., http://<casdoor-server-ip>:7001/cas/<organization name>/<application name>).Create user if not existEnable 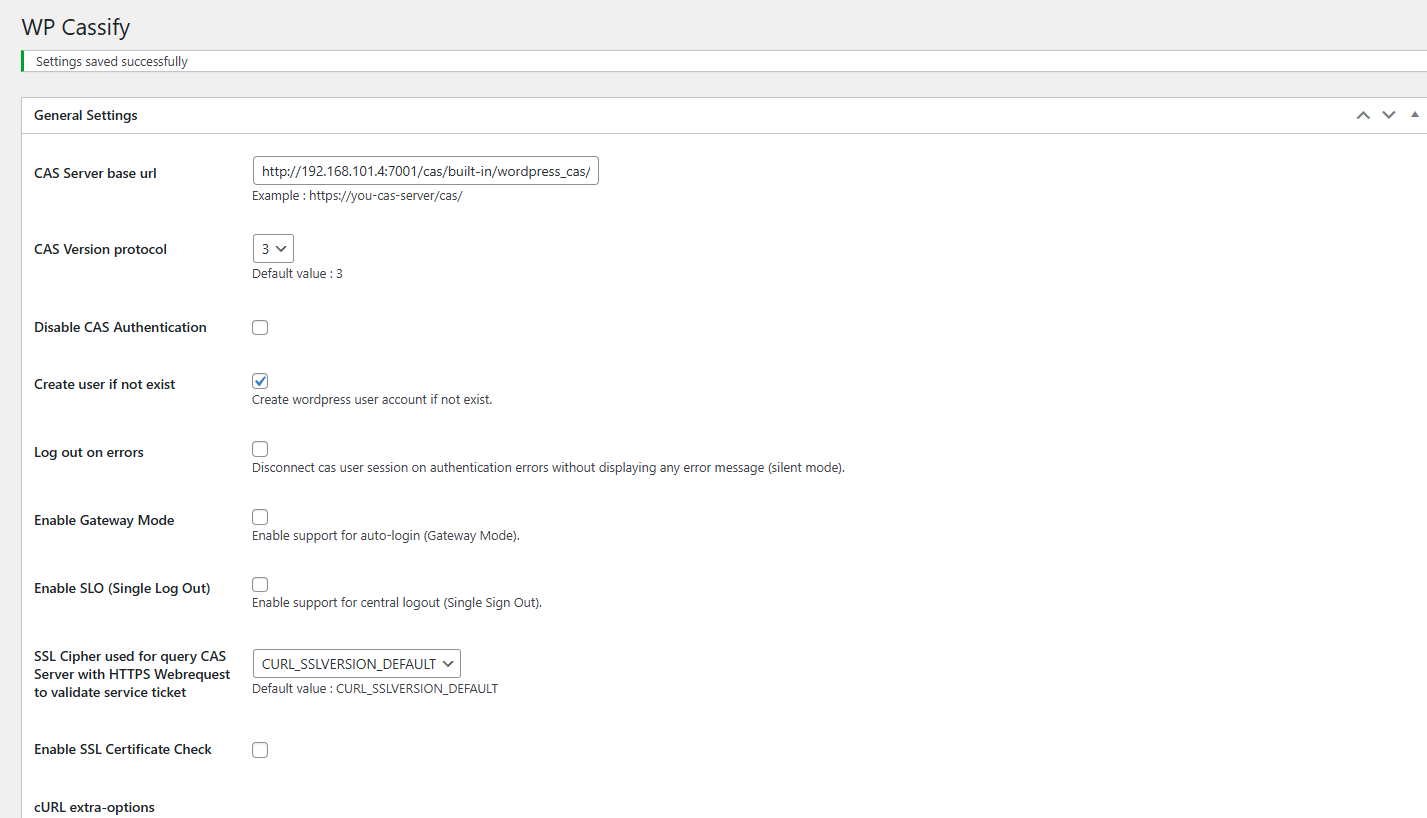
-
Configure User Attribute Synchronization.
WordPress User Field Casdoor Attribute Name Example Value user_emailemailuser@example.orguser_nicknamedisplayNameJohn Doe display_namedisplayNameJohn Doe 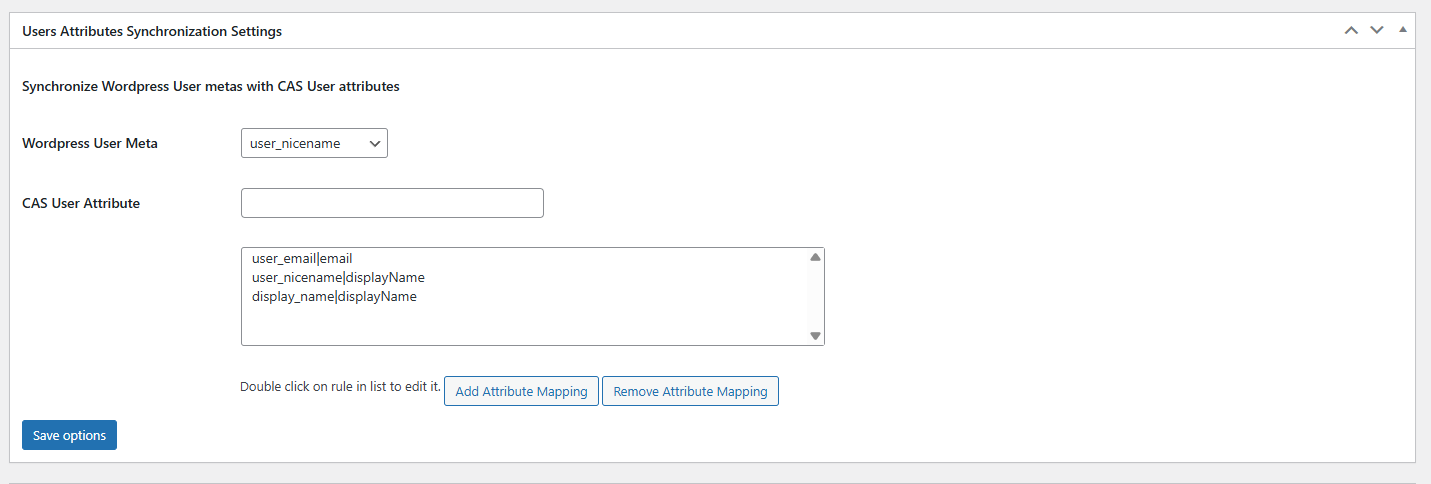
Step 4: Test CAS Authentication
Verify the integration works by logging into WordPress via Casdoor:
- Log out of the WordPress Admin Dashboard (if logged in).
- Access the WordPress login page (
http://<wordpress-server-ip>/wp-admin/index.php). - You’ll be redirected to the Casdoor login page. Enter valid Casdoor user credentials.
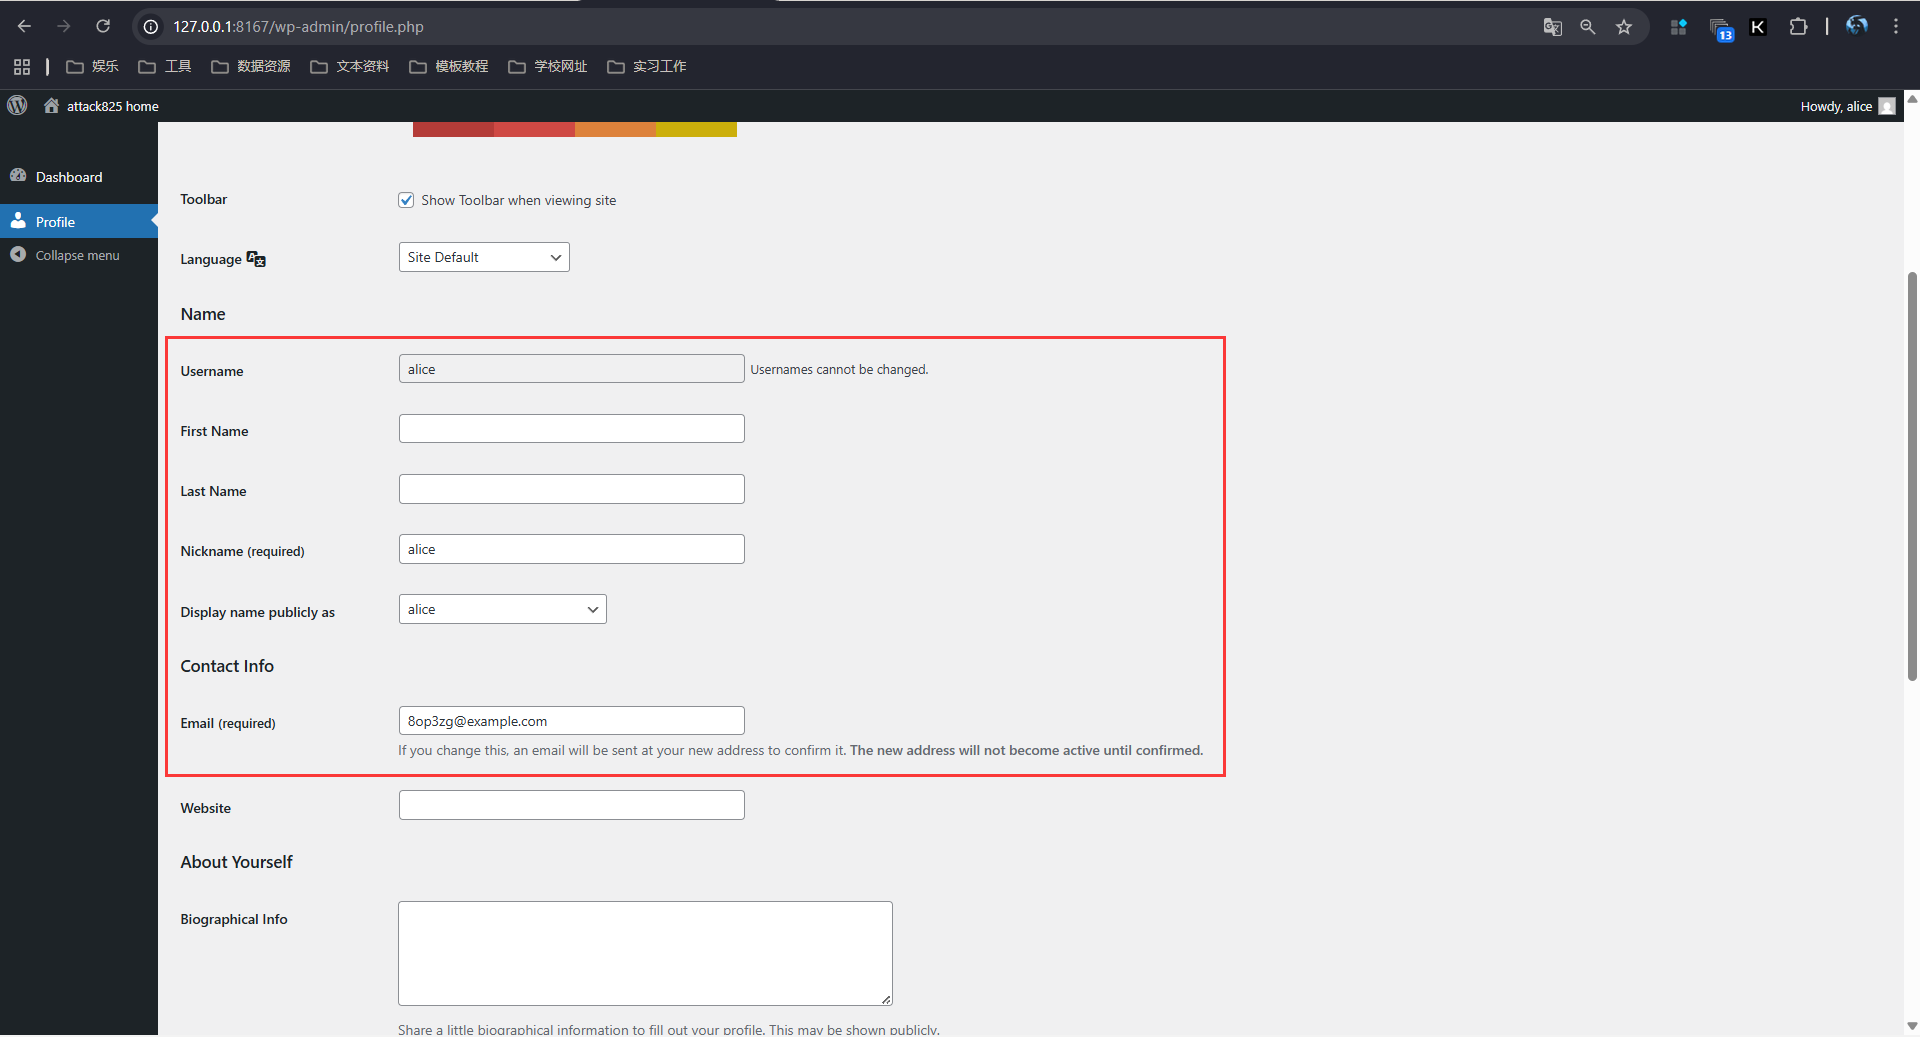
- After successful authentication, Casdoor will redirect you back to WordPress—you should now be logged in (as the synced user).