Customize the sign-up form
This guide explains how to build the sign-up form of an application with the Signup items table.
Learning outcomes
- Add, remove, and order the fields of the sign-up form.
- Make fields required and validate them with regular expressions.
- Change the behavior of fields with rules.
What you need
- An application with Enable signup turned on
About the sign-up items
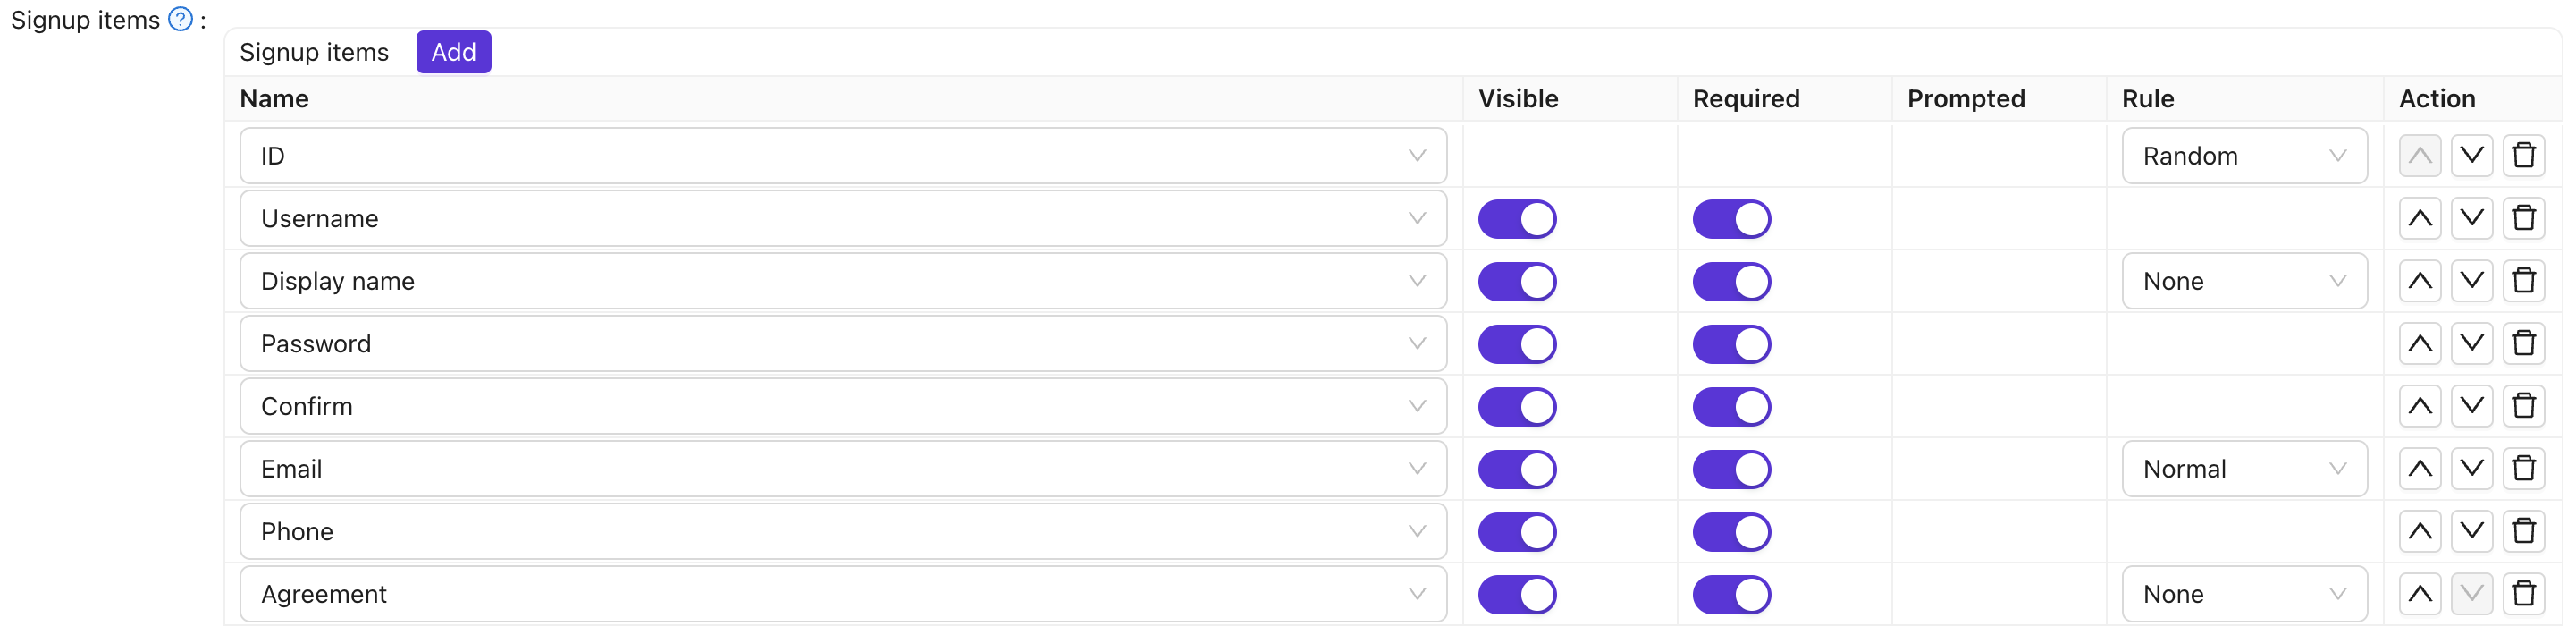
Each row of Signup items is one field or element of the sign-up page. Applications that you create through the Casdoor SDK get default items: ID, Username, Display name, Password, Confirm password, Email, Phone, and Agreement.
Columns
| Column | Values | Description |
|---|---|---|
| Name | — | Name of the signup item. |
| Visible | True / False | Show or hide on the registration page. |
| Required | True / False | Whether the field is mandatory. |
| Prompted | True / False | Whether to prompt the user if they leave it empty. |
| Regex | — | Optional regex for client-side validation. |
| Label | — | For items starting with Text, use HTML for the field; otherwise replaces the item label. |
| Custom CSS | — | CSS for this signup item. |
| Rule | Rule items | Rule that customizes this item (see table below). |
| Action | — | Move up, move down, or delete. |
Configure the form
- In the Casdoor admin console, open the edit page of the application.
- In Signup items, add, remove, and order the items, and set Visible and Required for each one.
- Set a rule for the items that support one. See Item rules.
- Save the application.
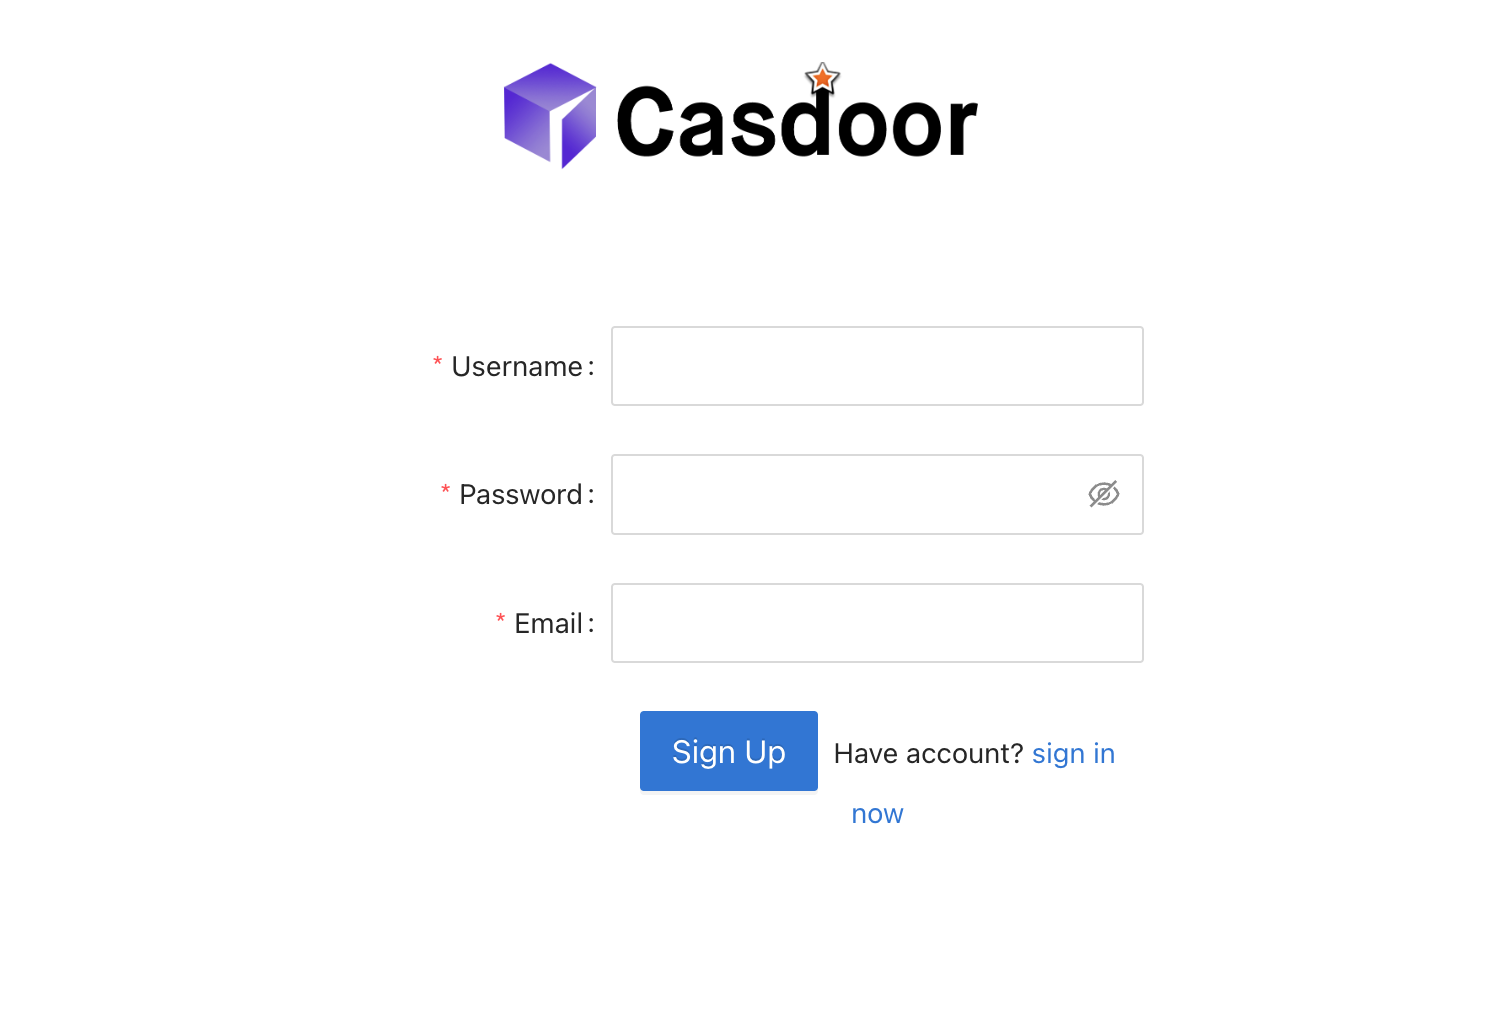
For example, to show an email field that doesn't need verification, add the Email item and set its rule to No verification.

The sign-up page then looks like this:
Item rules
| Item | Rules | Description |
|---|---|---|
| ID | Random / Incremental | User ID generation: random or incremental. |
| Display name | None / Real name / First, last | How to show the display name; First, last shows first and last name separately. |
Normal / No verification | Normal = require email verification; No verification = skip verification. | |
| Agreement | None / Signin / Signin (Default True) | Terms of use: none, require confirmation, or default to confirmed. |
| Languages | None / Label | Adds a language selector to the sign-up page. None = show the selector on its own; Label = show it with a text label. |
Let users choose a tag
The Tag item adds a list from which users pick their own tag at sign-up. It is hidden by default. Turn on Visible to show it.
- The options come from the Options of the item. If the item has no options, they come from the Tags of the application.
- A tag that the user selects takes precedence over the Default tag of the application, which applies only when the user selects none.
Validate input with a regular expression
- In the row of the item, set Regex to a pattern, for example
^[a-zA-Z0-9_]+$for usernames of letters, digits, and underscores. - Save the application.
The sign-up page shows an error before submission when the input doesn't match. Validation works for Username, Display name, First name, Last name, Affiliation, and custom fields.
Use the email address as username
If the organization has Use Email as username turned on and the Username item is hidden, the email address of the user becomes the username. See Organizations.