Connect AWS Client VPN with SAML
This guide explains how to use Casdoor as the SAML identity provider (IdP) of AWS Client VPN.
Learning outcomes
- Configure a Casdoor application for AWS Client VPN.
- Add Casdoor as a SAML identity provider in AWS IAM.
- Create a Client VPN endpoint that authenticates users through Casdoor.
- Connect to the VPN.
What you need
- An AWS account with the rights to configure IAM and VPC
- An Amazon VPC with an EC2 instance. See Get started with Amazon VPC and Get started with Amazon EC2. To test the connection, allow ICMP from the CIDR of the VPC in the security group of the instance.
- A private certificate in AWS Certificate Manager (ACM). See the AWS Client VPN administrator guide.
- A Windows or Mac computer with the AWS Client VPN application
- An application in Casdoor
Configure the Casdoor application
-
In the Casdoor admin console, open the edit page of the application.
-
Add
urn:amazon:webservices:clientvpnto Redirect URLs.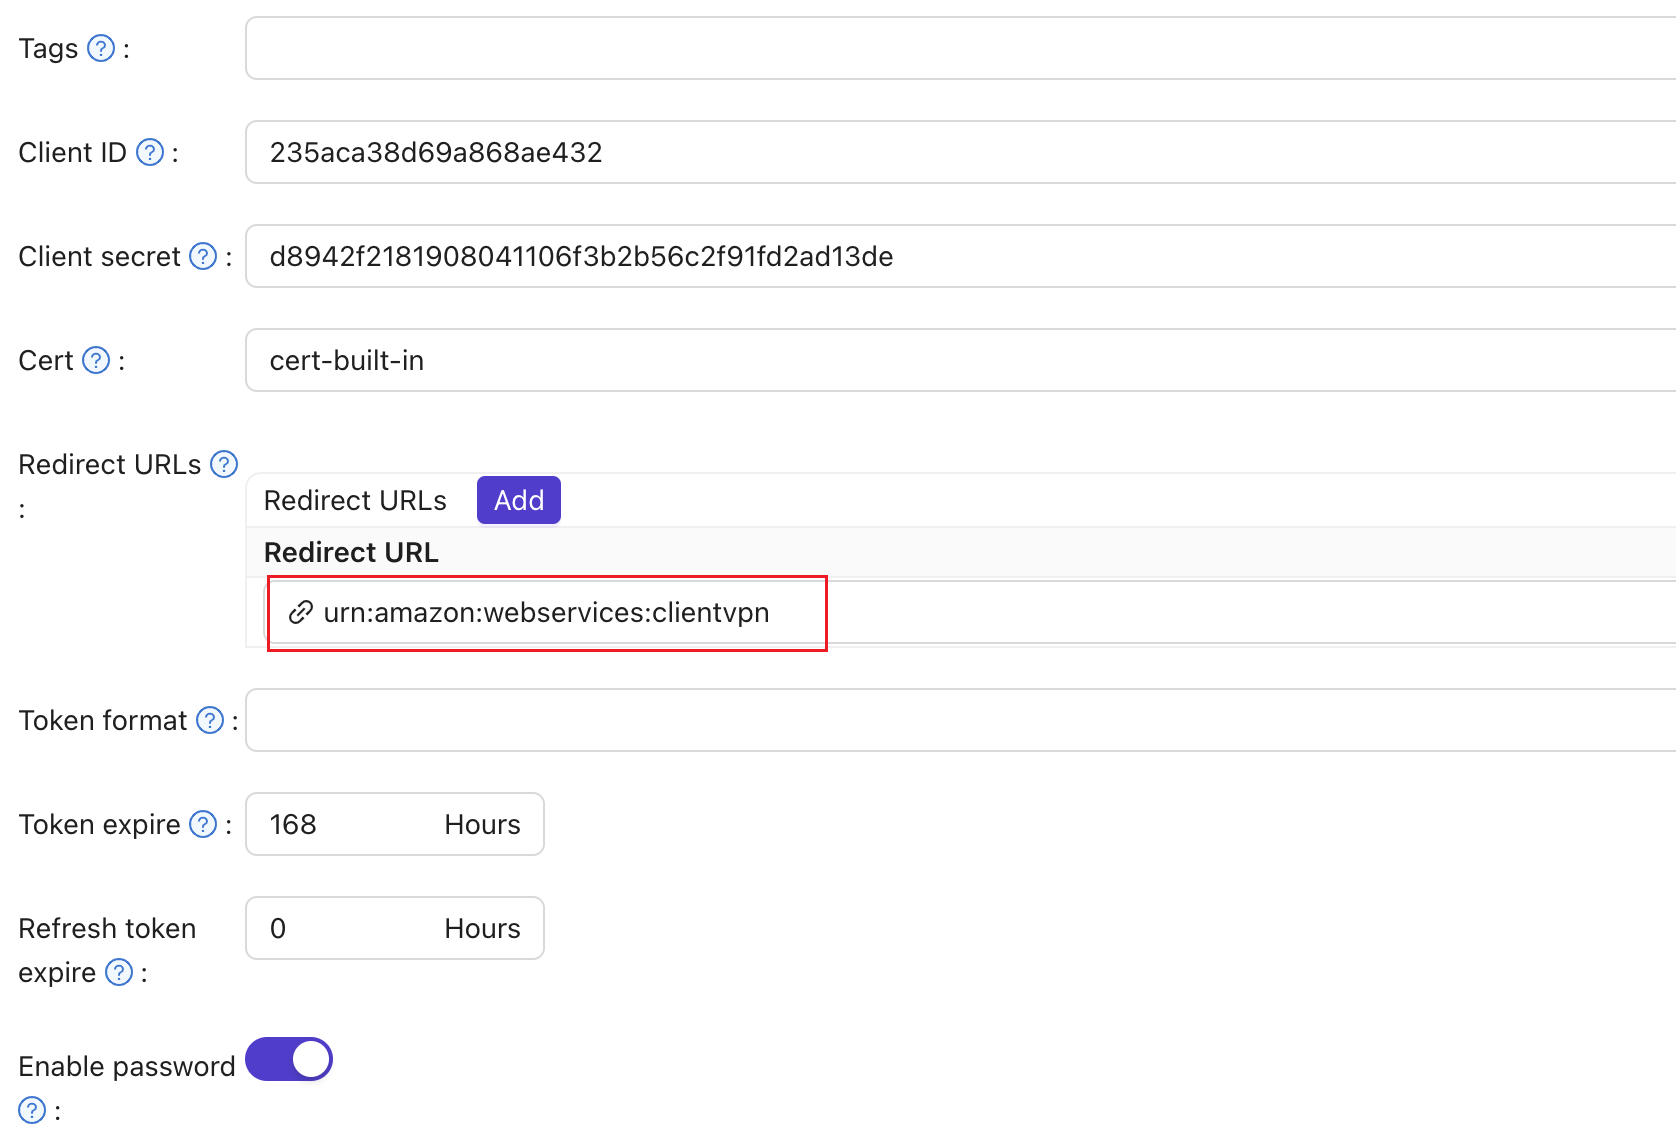
-
Set SAML reply URL to
http://127.0.0.1:35001.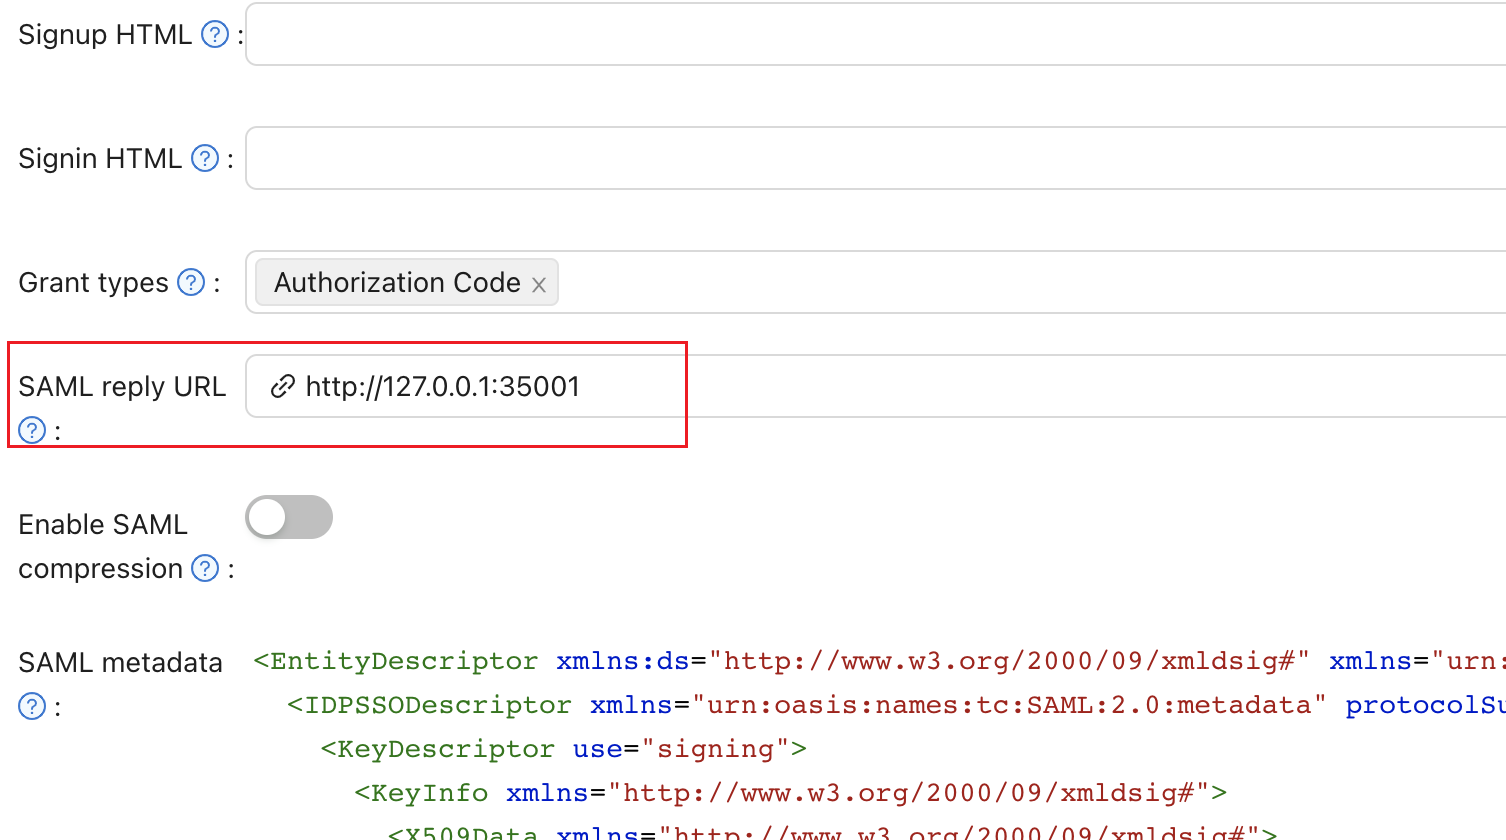
-
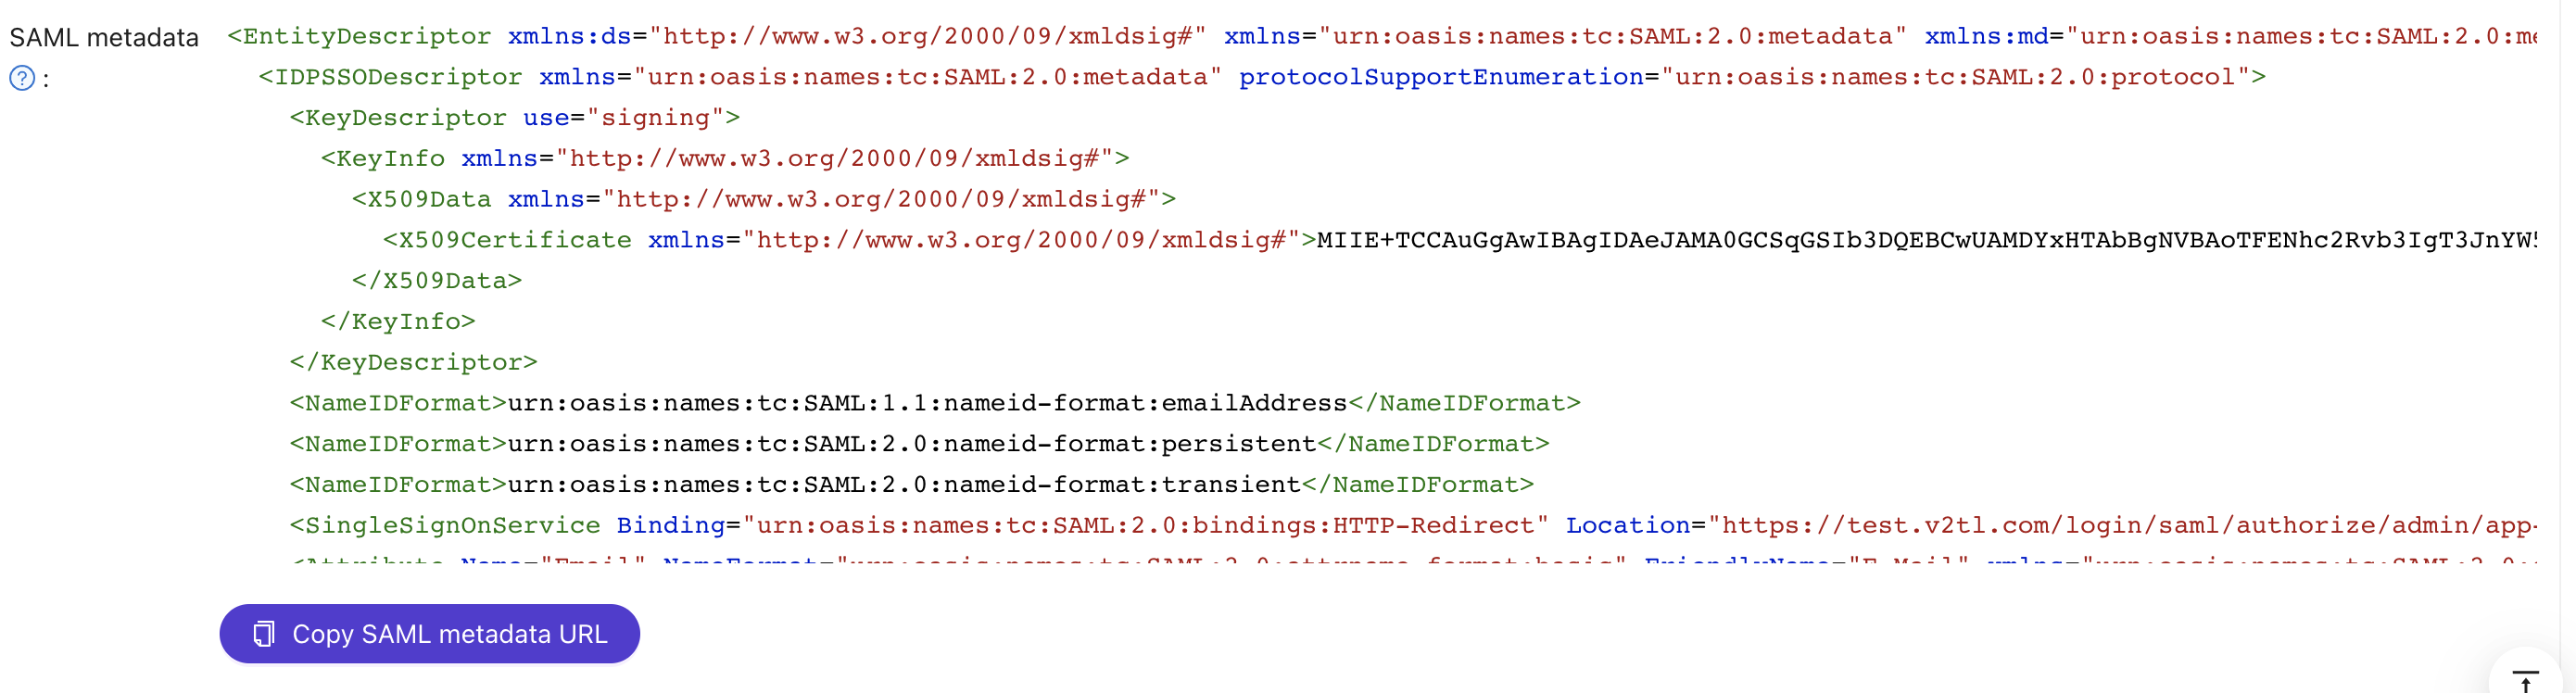
Save the SAML metadata as an XML file. You upload it to AWS in the next section.
Add Casdoor as an identity provider in AWS
-
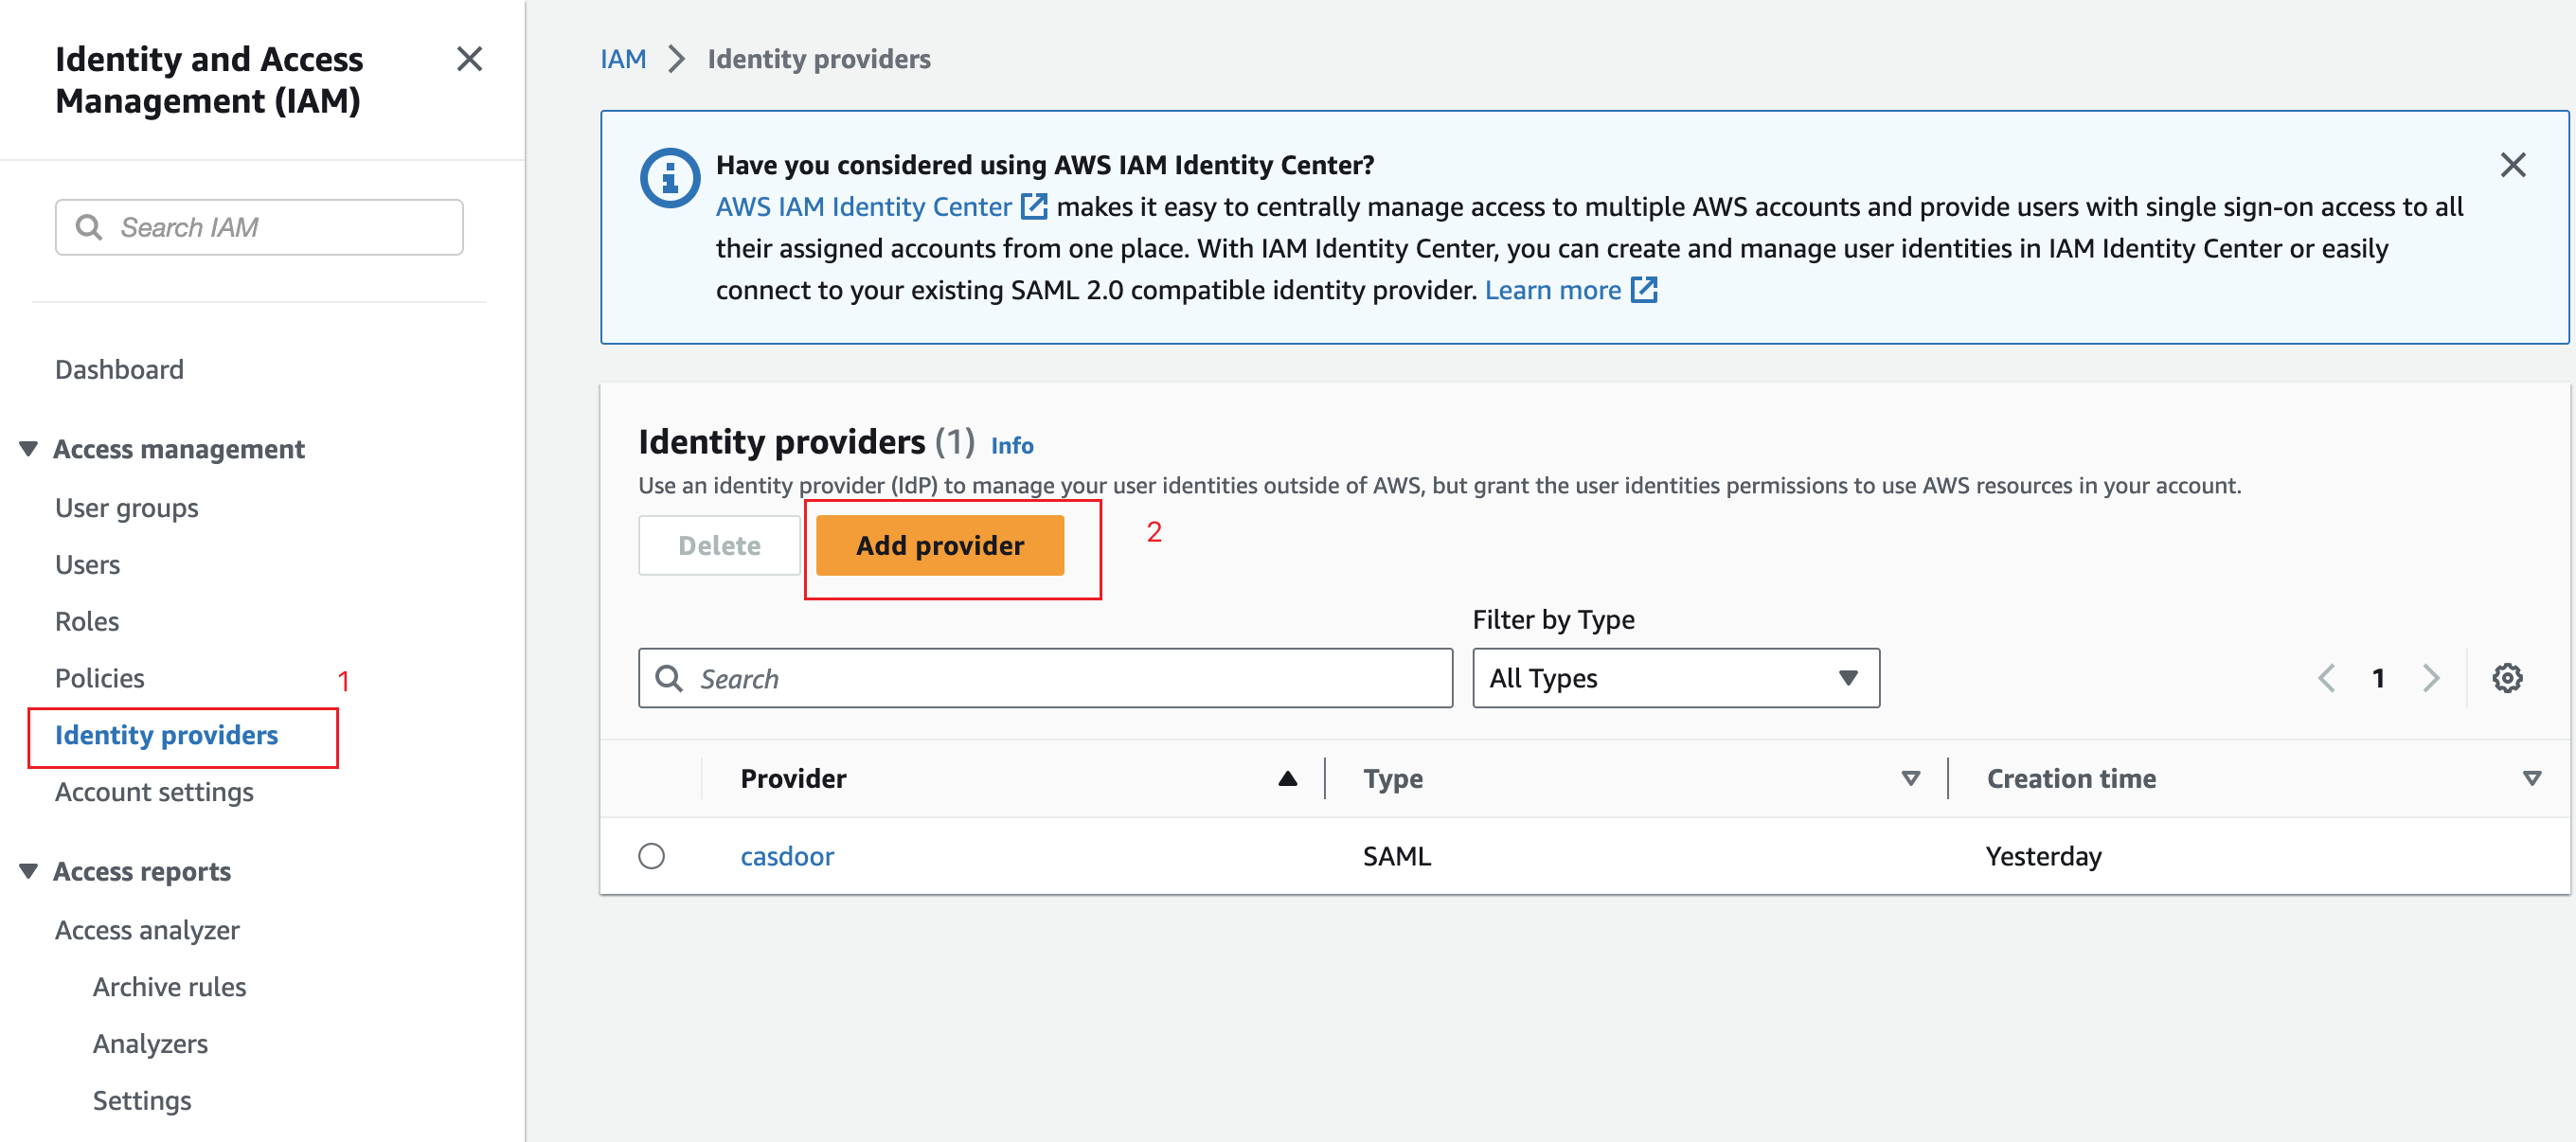
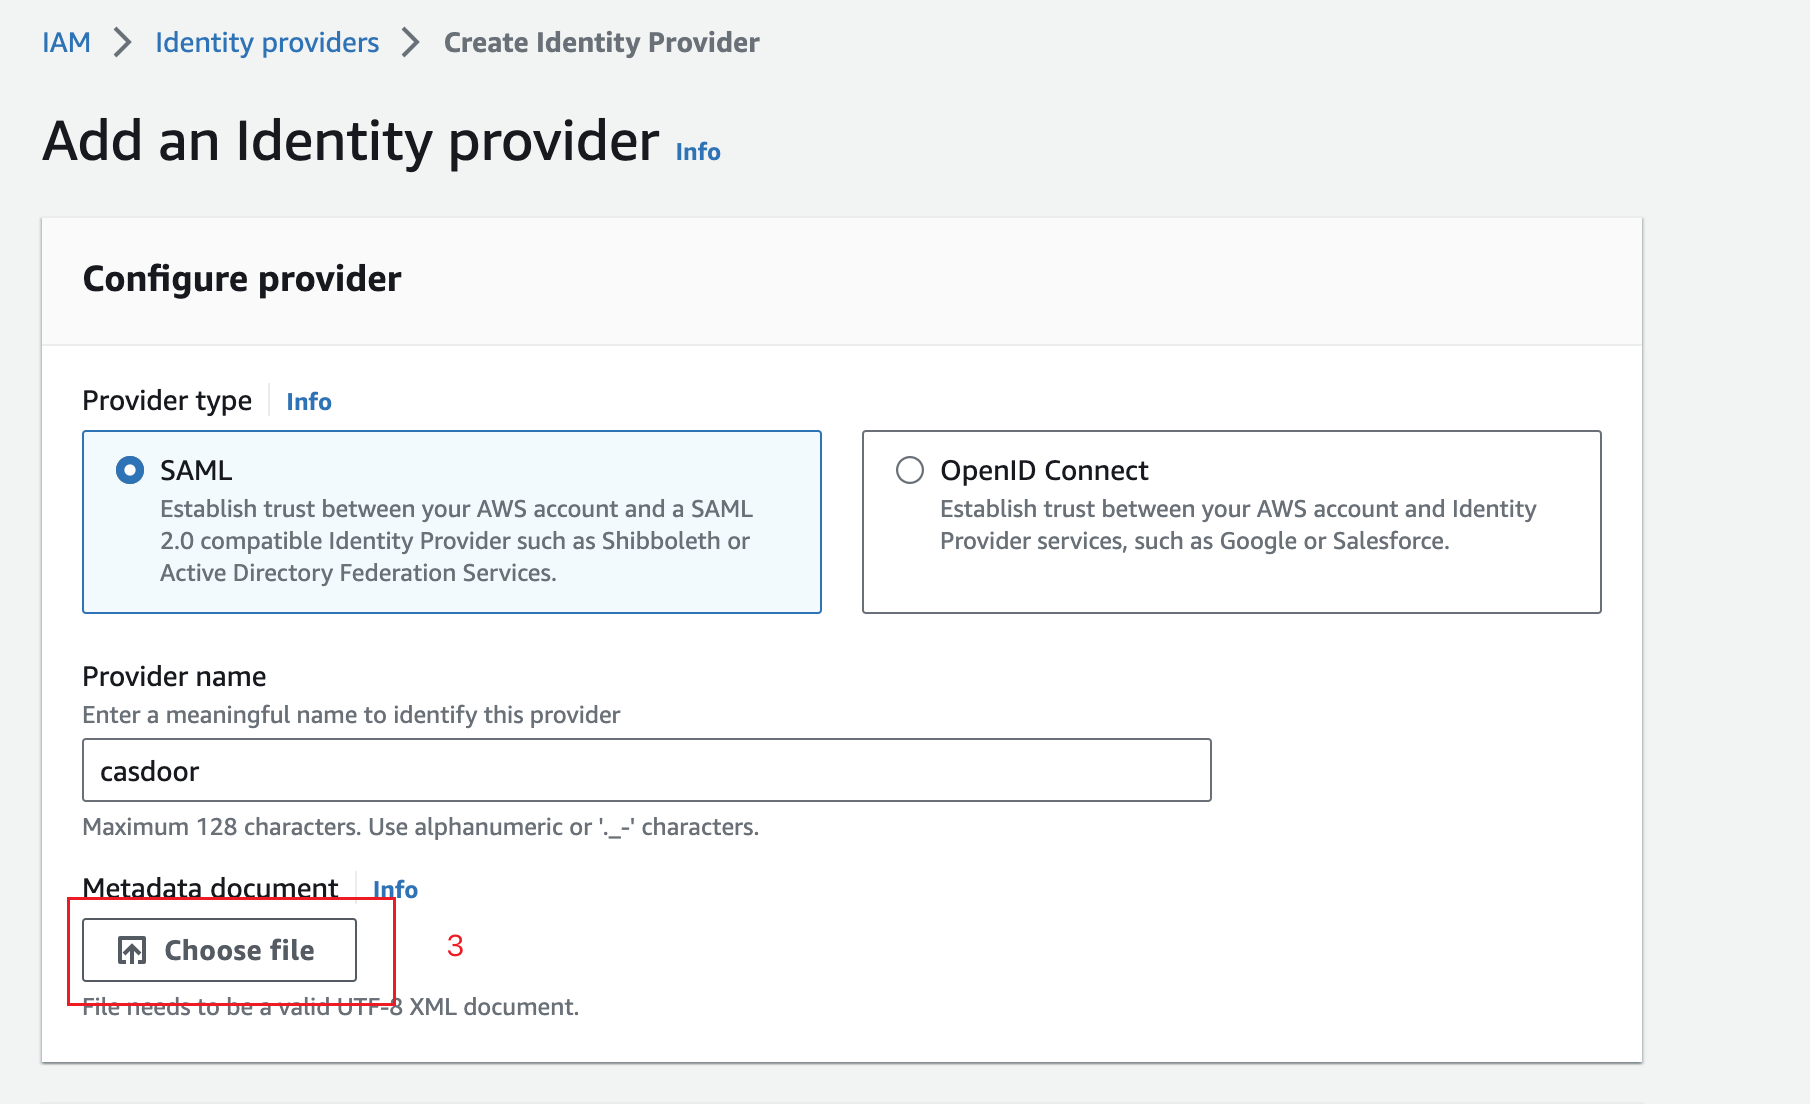
In the IAM console, go to Identity providers and click Create provider.
-
Select SAML, enter a name for the provider, and upload the metadata file from Casdoor.
-
Click Next step, and then Create.
Create a Client VPN endpoint
-
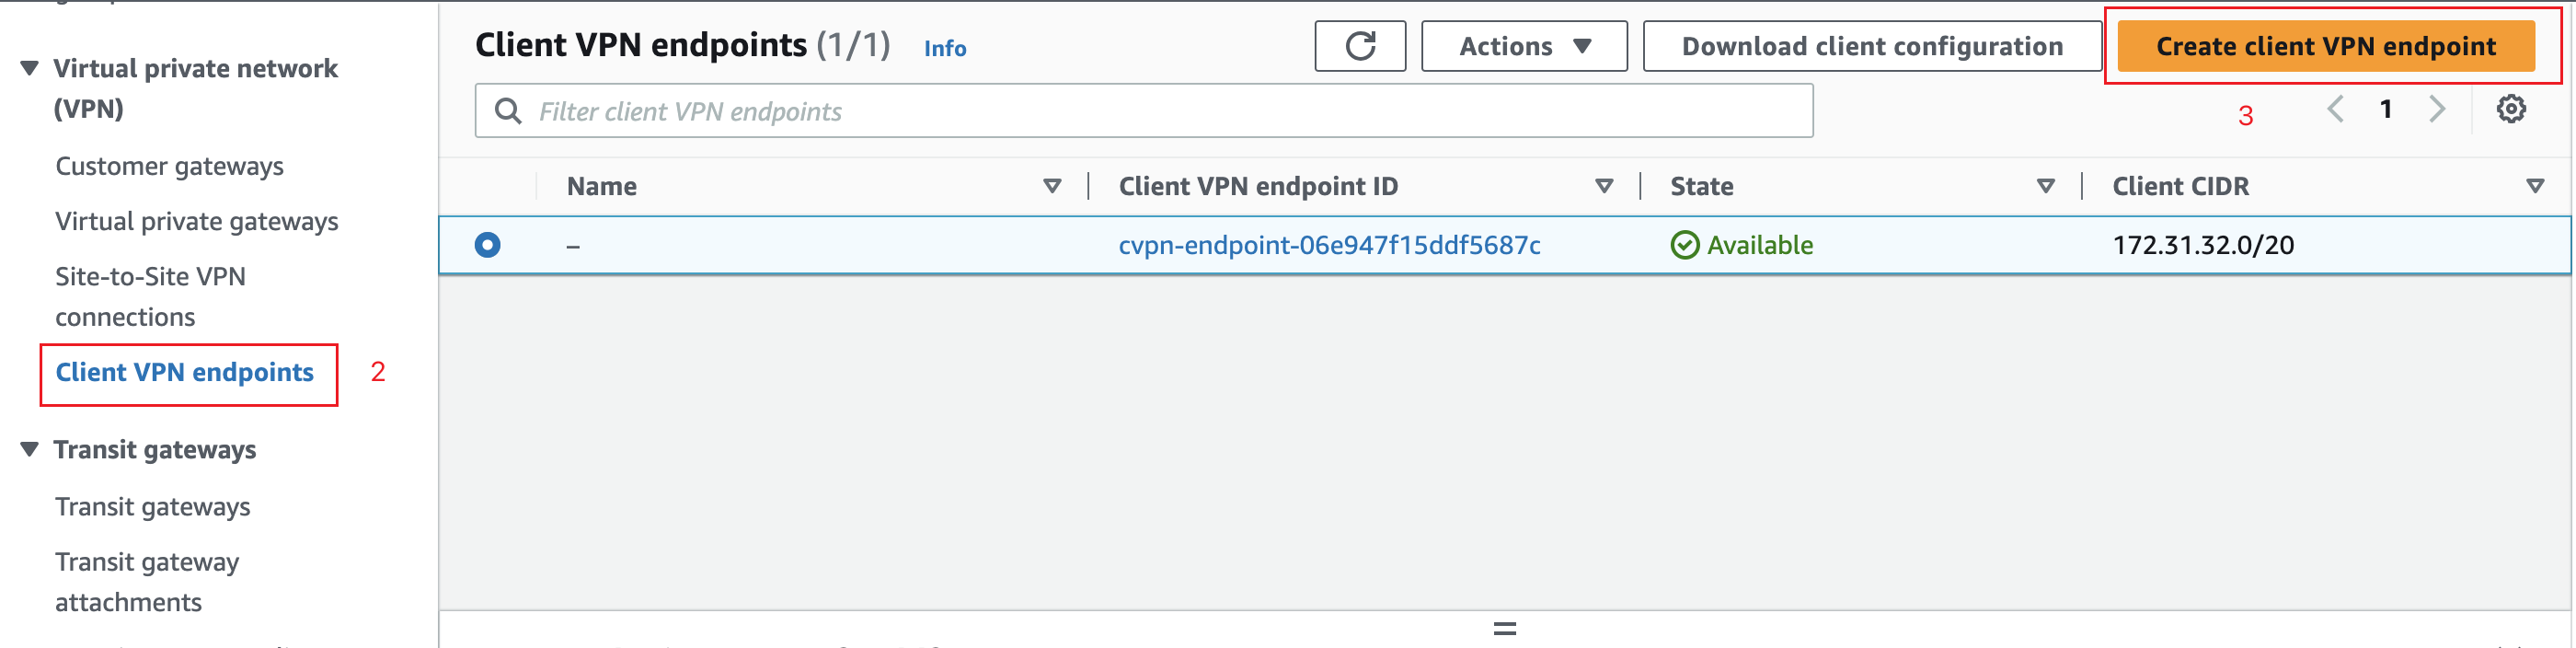
In the VPC console, go to Client VPN Endpoints and click Create Client VPN Endpoint.
-
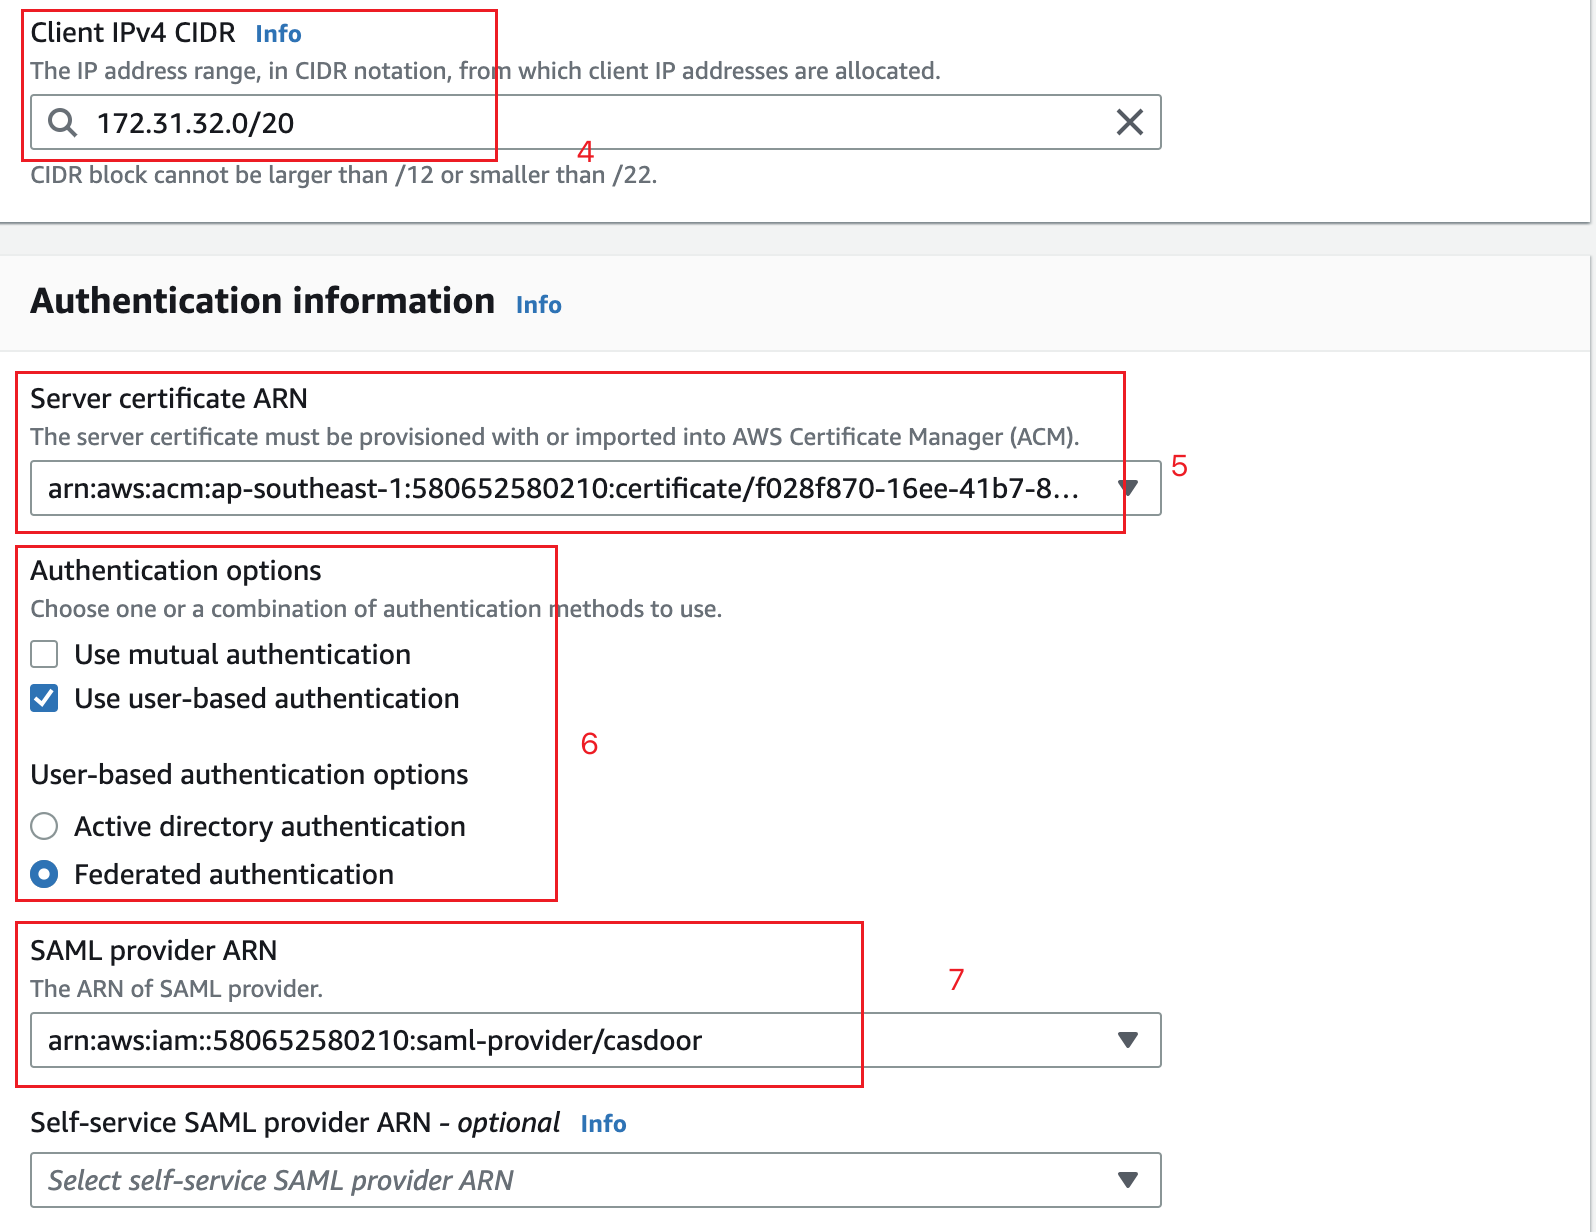
In Client IPv4 CIDR, enter the address range for remote users.
-
In Server certificate, select your certificate from ACM.
-
Under Authentication, select User-based authentication, and then Federated authentication.
-
Select the SAML identity provider that you created.
-
Click Create Client VPN Endpoint.
Associate the endpoint with a VPC
-
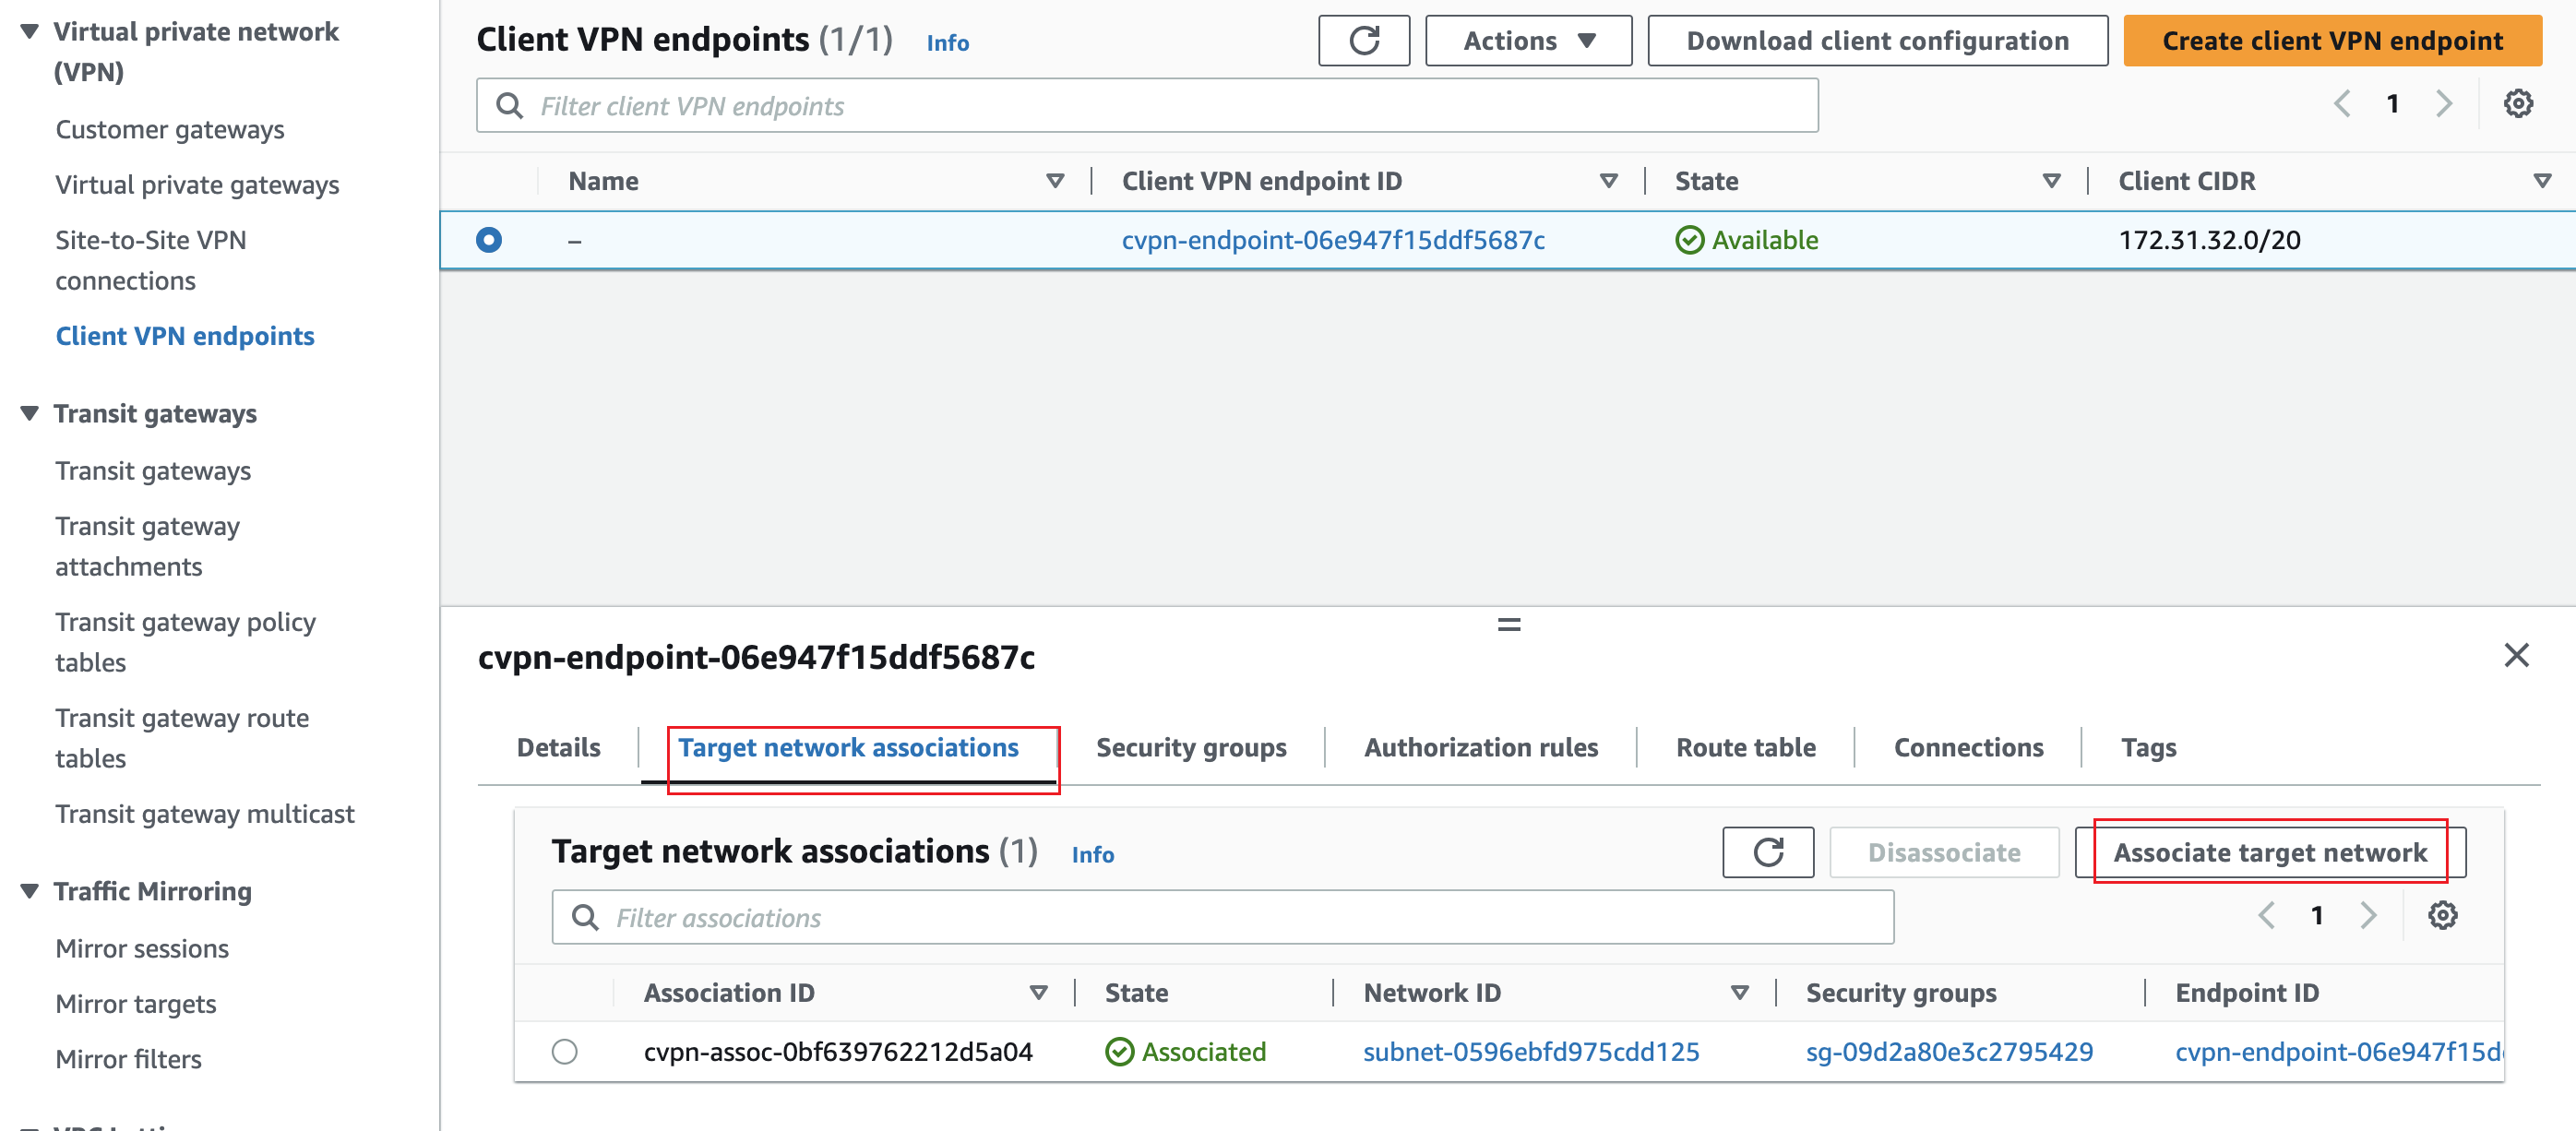
Open the endpoint, go to Target network associations, and click Associate target network.
-
Select the VPC and the subnet.
Add an authorization rule
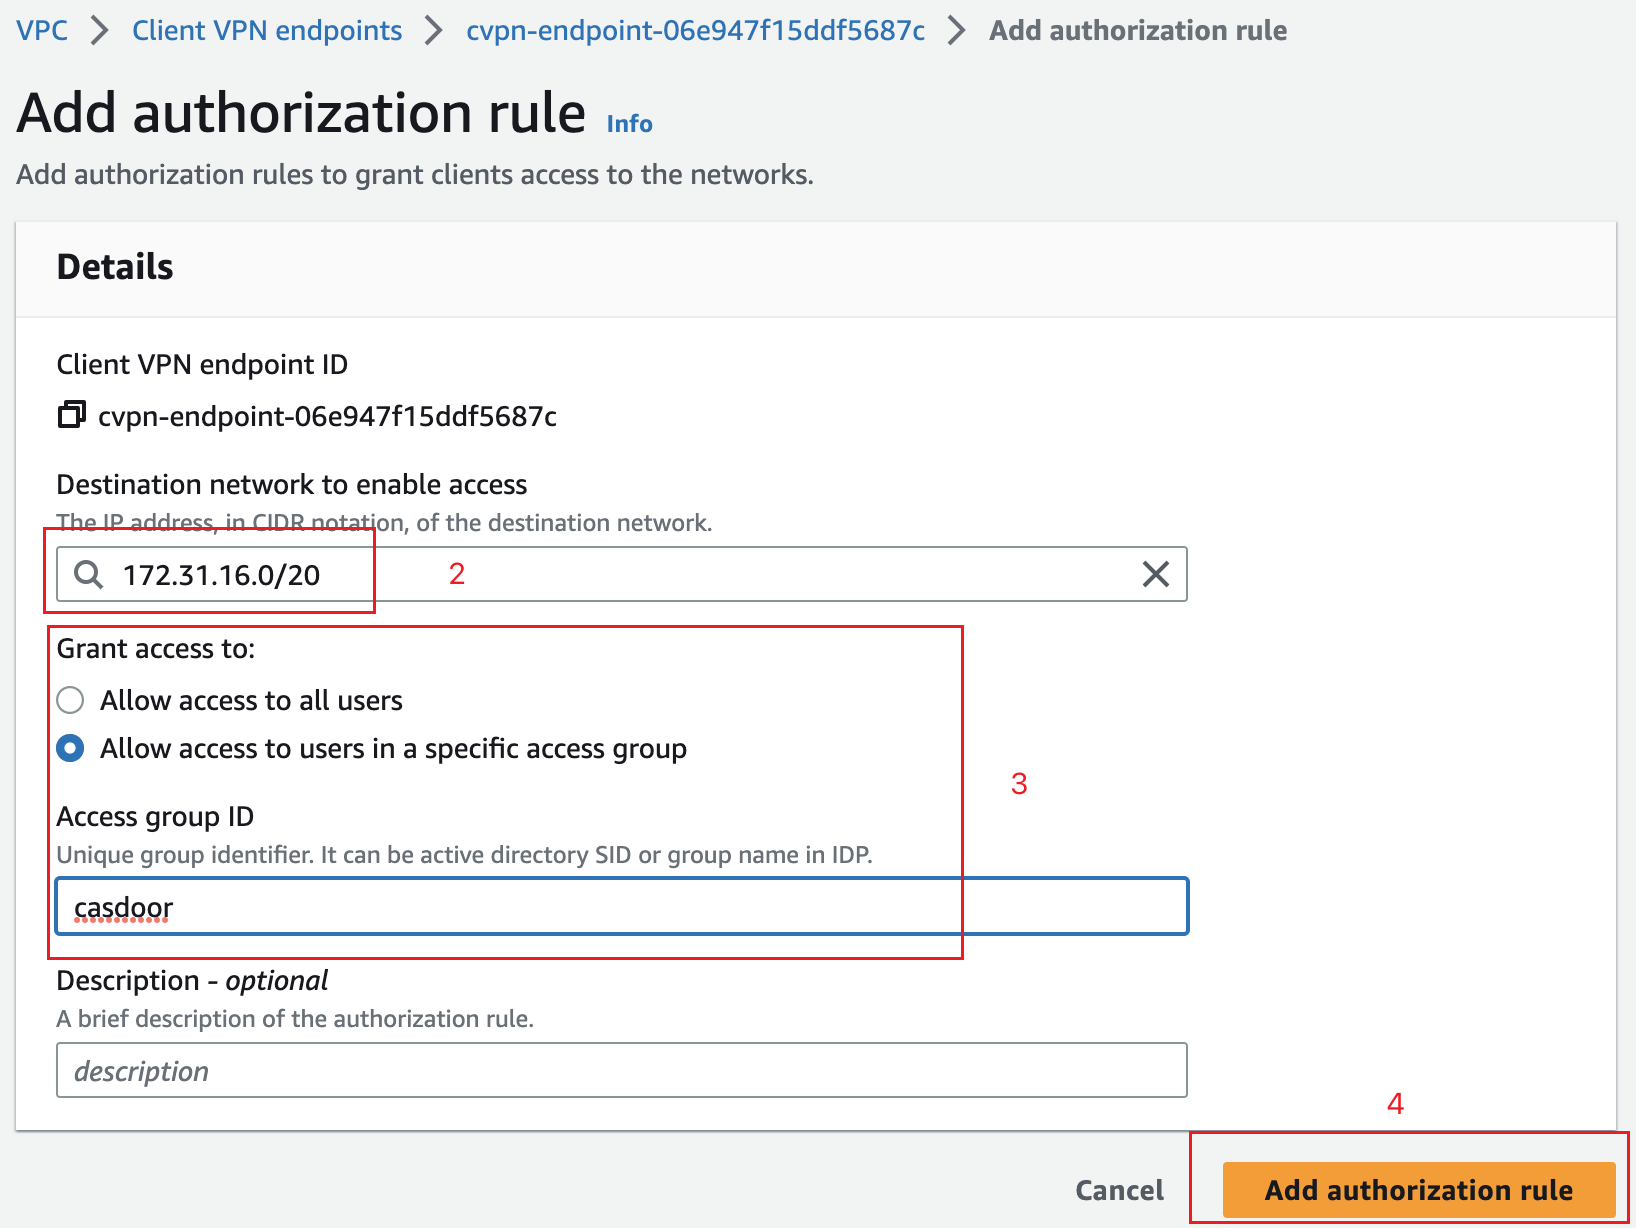
This step is optional. It limits access to a network to one group of users.
-
Open the endpoint, go to Authorization rules, and click Add authorize rule.
-
In Destination network, enter the network of your EC2 instance, for example
172.31.16.0/20. -
Under Grant access to, select Allow access to users in a specific access group and enter the name of the group, for example
casdoor. -
Add the rule.
Verify the result
-
In the VPC console, select the endpoint, wait until its state is
Available, and click Download Client Configuration.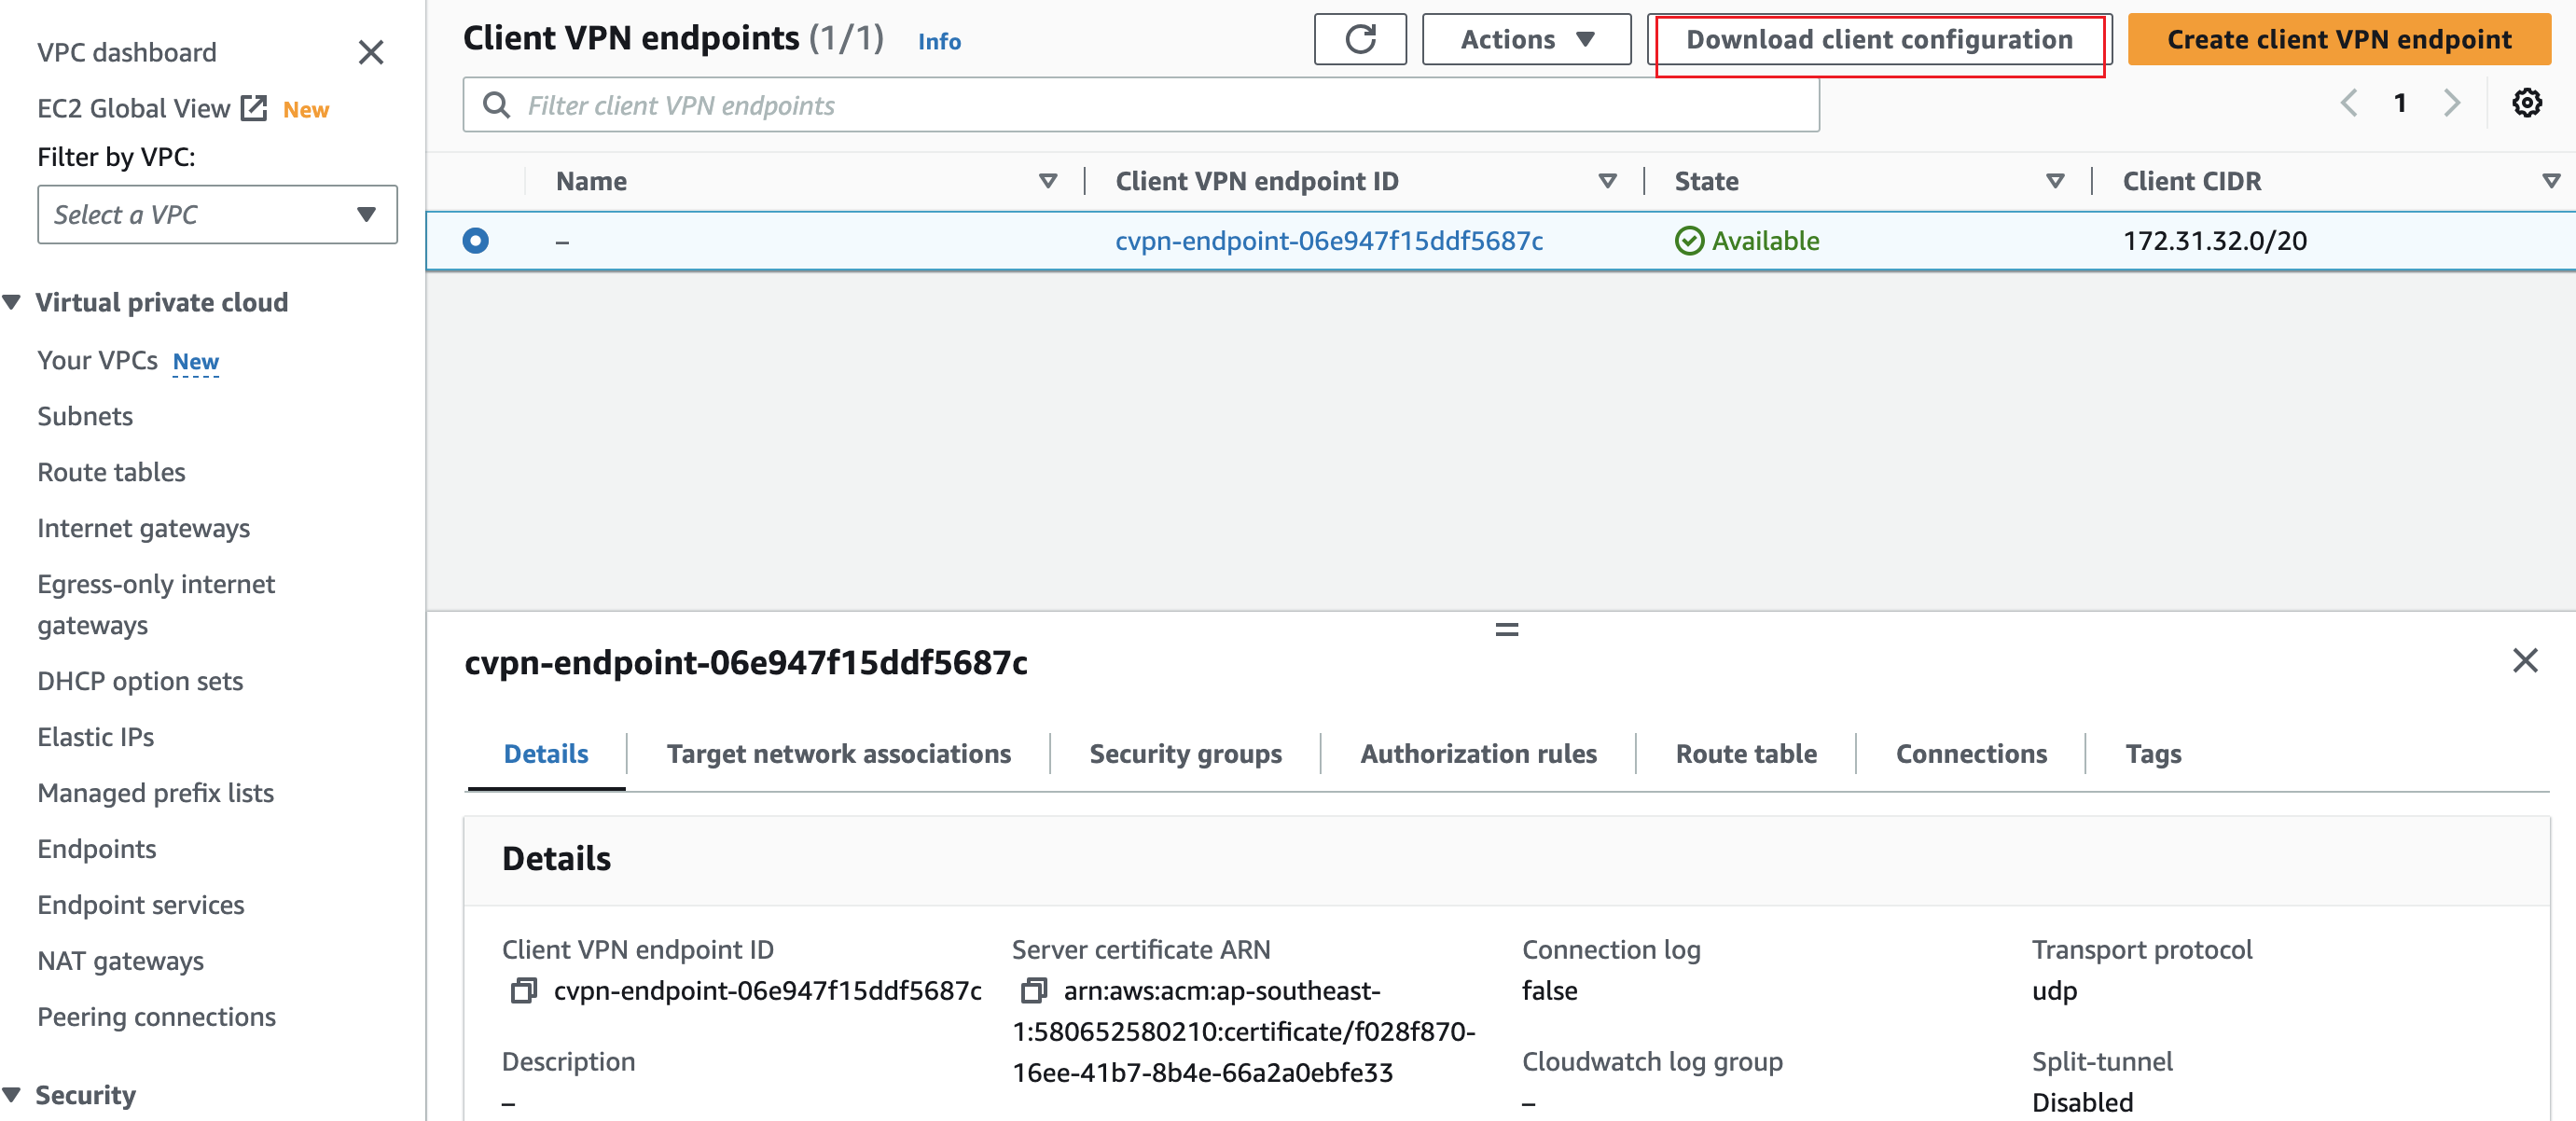
-
In the AWS Client VPN application, go to File > Manage Profiles, click Add Profile, and select the downloaded file.
-
Select the profile and click Connect. The Casdoor sign-in page opens in your browser. After you sign in, the VPN connects.