Add a custom OAuth provider
This guide explains how to connect Casdoor to an OAuth 2.0 identity provider that has no built-in type, such as an internal identity provider or a self-hosted service. You can add up to ten custom providers, with the types Custom, Custom2, and so on up to Custom10, each with its own configuration.
Learning outcomes
- Configure a custom OAuth provider.
- Know which requests Casdoor sends and which responses it expects.
What you need
- An identity provider that supports the standard three-legged OAuth 2.0 authorization code flow
- The authorization, token, and user info endpoints of the provider, and a client ID and client secret from it
Create the provider
-
In the Casdoor admin console, go to Identity > Providers and add a provider.
-
Set Category to
OAuthand Type to one ofCustomtoCustom10. -
Fill in the fields:
Field Description Client ID, Client secret Credentials that the identity provider issued Auth URL Authorization endpoint of the identity provider Scope Scopes to request, as the identity provider documents them Enable PKCE Adds Proof Key for Code Exchange (PKCE) to the flow Token URL Token endpoint of the identity provider UserInfo URL User info endpoint of the identity provider Favicon URL of the logo that the Casdoor sign-in page shows 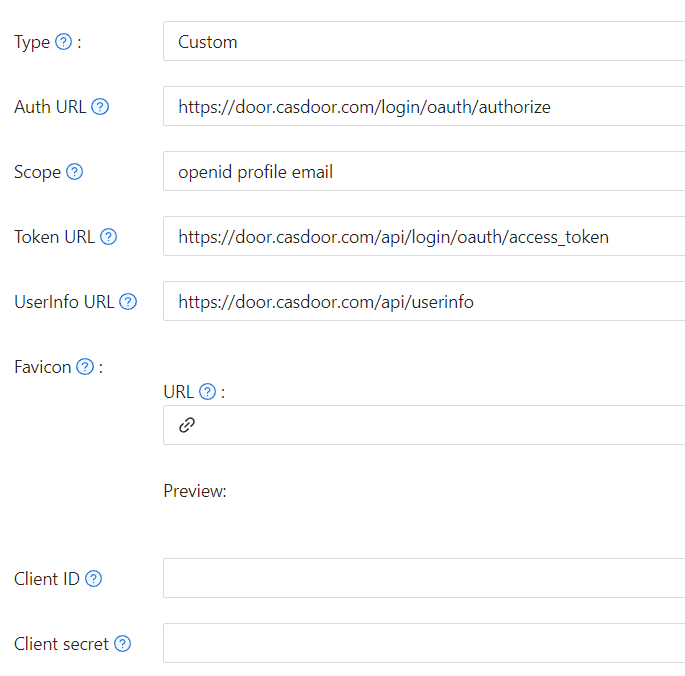
-
Save the provider.
Requests and responses
The identity provider must handle the following requests and return the following responses. The examples use Casdoor itself as the identity provider.
Authorization
Casdoor sends the browser to the Auth URL:
https://door.casdoor.com/login/oauth/authorize?client_id={ClientID}&redirect_uri=https://{your-casdoor-hostname}/callback&state={State_generated_by_Casdoor}&response_type=code&scope={Scope}`
With Enable PKCE on, Casdoor appends:
&code_challenge={code_challenge}&code_challenge_method=S256
After the user signs in, the identity provider redirects to the callback of Casdoor with the code:
https://{your-casdoor-hostname}/callback?code={code}
With PKCE, Casdoor generates a new random code verifier for each sign-in, computes the S256 challenge, and stores the verifier in localStorage under the OAuth state. It deletes the verifier after use.
Token
Casdoor exchanges the code at the Token URL:
curl -X POST -u "{ClientID}:{ClientSecret}" --data-binary "code={code}&grant_type=authorization_code&redirect_uri=https://{your-casdoor-hostname}/callback" https://door.casdoor.com/api/login/oauth/access_token
With PKCE, the request includes the code verifier:
curl -X POST -u "{ClientID}:{ClientSecret}" --data-binary "code={code}&grant_type=authorization_code&redirect_uri=https://{your-casdoor-hostname}/callback&code_verifier={code_verifier}" https://door.casdoor.com/api/login/oauth/access_token
The response must contain at least:
{
  "access_token": "eyJhbGciOiJSUzI1NiIsImtpZCI6Ixxxxxxxxxxxxxx",
  "refresh_token": "eyJhbGciOiJSUzI1NiIsInR5cCI6xxxxxxxxxxxxxx",
  "token_type": "Bearer",
  "expires_in": 10080,
  "scope": "openid profile email"
}
User info
Casdoor reads the user from the UserInfo URL with the access token:
curl -X GET -H "Authorization: Bearer {accessToken}" https://door.casdoor.com/api/userinfo
The response must contain at least:
{
  "name": "admin",
  "preferred_username": "Admin",
  "email": "admin@example.com",
  "picture": "https://casbin.org/img/casbin.svg",
  "phone": "+1234567890"
}
phone is optional. If the response contains it, Casdoor stores it as the phone number of the user.
Next steps
Add the provider to an application. See Add providers to an application.